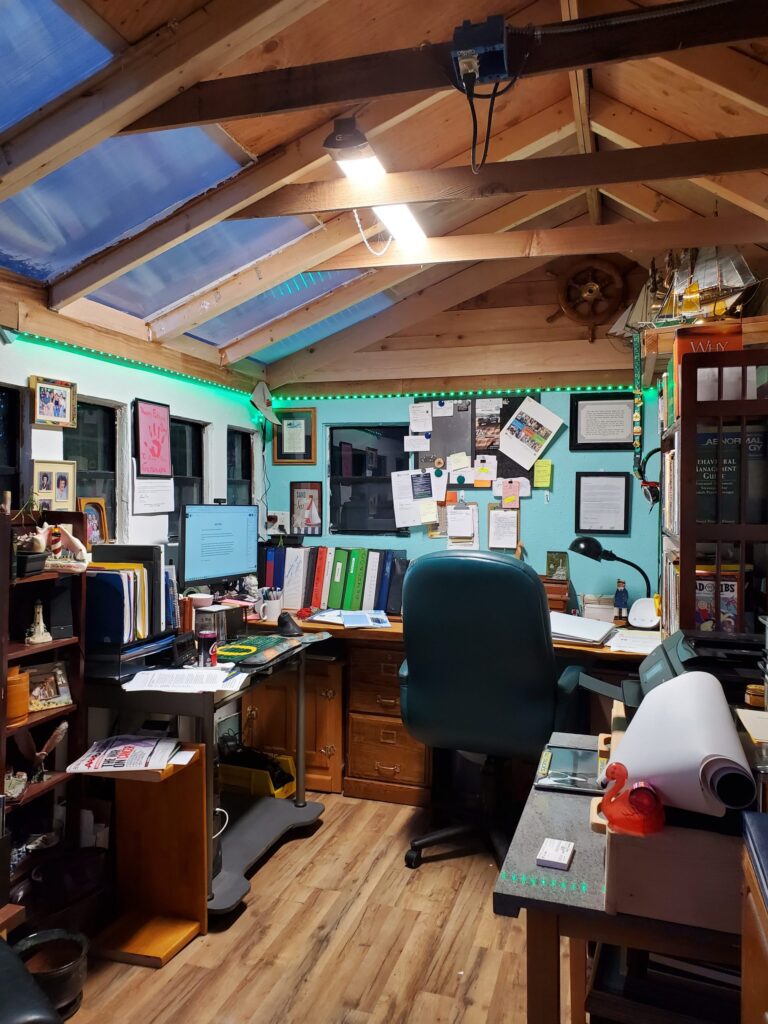
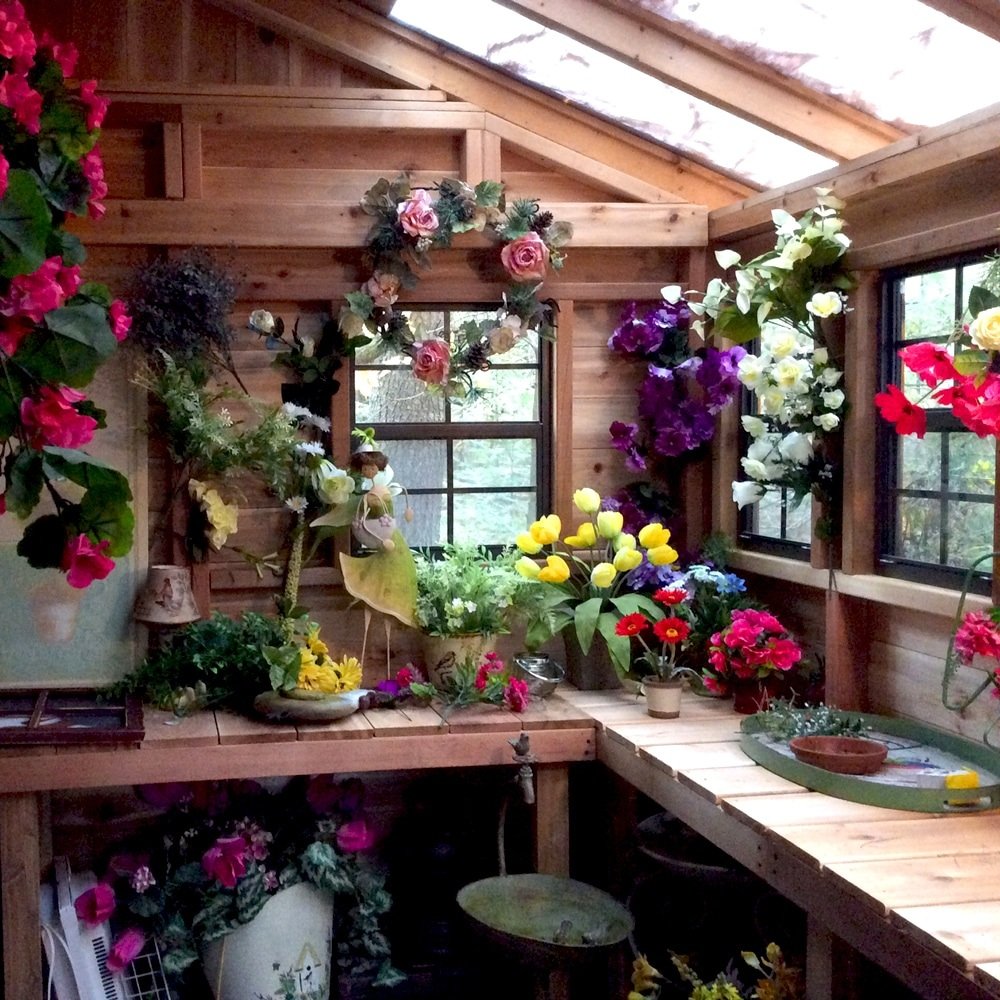
Wooden Shed or Plastic Shed The environment should be respected and many people are trying to save/impact it with small steps that, collectively, could impact the atmosphere in a major way. If you are looking to be more eco-friendly, why not include your garden in your plans? Growing your own fruits and vegetables and using rainwater harvesting systems are just a few of the ways you can become more environmentally-friendly. If you are looking for different methods to reduce your carbon footprint, keep in mind that your garden shed can play a huge role. There are quite a few incredible ways to transform your shed into an eco-friendly zone.

Wooden Shed or Plastic Shed?

Sustainable Structure

If you need to replace your old shed with a new structure, make sure that you choose one which is made out of responsibly-sourced material from an ethical manufacturing company. When trying to decide between a wooden shed or plastic shed, wood is your best choice in our opinion. Wood has a negative carbon footprint and acts as a carbon sink which is excellent. This means as a tree grows, it stores carbon in its fiber. When a tree is harvested and cut down and made into a shed or other building product, the carbon stays in the product and does not get released until the life cycle of the product has ended. In comparison, sheds made from plastic, steel and aluminum use a tremendous amount of CO2 in the production process which is released immediately into the atmosphere. This release of carbon during processing increases the global warming crises we are now in. Garden sheds made with plastic are also more difficult and expensive to recycle and use additional CO2 in the recycle process. By using easier to recycle materials such as wood, you lessen your carbon footprint as well. If a wood shed is well-constructed and prepared properly for the elements it can last for a very long time, particularly if made from western red cedar, which is naturally resistant to decay and rot. Other wood species, such as pine, can be chemically treated to extend its life to replicate cedar wood. If you prefer, you can finish your wood shed yourself with special treatments to make it weather and water proof. These treatments will give your outdoor space the look you desire and make sure that extreme weather conditions do not cause any damage and that it will last for years to come. Meanwhile, remember to check the credentials of the company you are planning to buy from, either wood, plastic or metal, to ensure that they are environmentally-conscious and the materials they use are 100% sourced from certified materials, procedures and standards. If you buy a shed from an overseas manufacturer, consider that country’s environmental practices and the materials they are using. Ethical companies in North America, particularly forest companies, will always go through the effort of achieving certified accreditation from such organizations as the Forest Stewardship Council (FSC) or The Program for the Endorsement of Forest Certification (PEFC). Both accreditations are confirmed only through independent third party inspections, ensuring the wood they are harvesting comes only from legally and sustainably managed forests.

A Suitable Investment

Like pergolas, gazebos, and other outdoor structures,  a wooden shed or plastic shed is an excellent addition to your property. All structures offer you an outdoor space that you can make good use of and also add value to your property. Western red cedar garden sheds are a fantastic option if you are looking for an outdoor structure made with eco-friendly materials. By choosing a shed made of wood, you are making sure that you reduce your carbon footprint and contribute to making the earth a greener and cleaner place.
Read More

Congratulations! You have finally bought the DIY garden shed kit and you are ready to prepare the ground for the new shed. The Western Red Cedar panels will last a long time and naturally resist pests. The shed will be functional, but it also can turn into a focal point of your garden, as long as you go about the installation process correctly.

You can use your garden shed to store your gardening implements, but you also can use it as a hobby room, your private escape, game room for kids, or anything else you can think of. This multi-functional space extends your living space outdoors and if you add insulation, you can use it round the year beyond being just a storage place for your gardening tools, grass/plant seed, and implements.

Prepare the Ground for the New Shed

The first thing that you need to do to prepare the ground for the new shed is to level the surface. You can do this by first putting in concrete, timber decking, or a garden slab. If you don’t do this, it could result in the garden shed warping, broken windows and even damage to the wood.

Even if you use the shed base that comes with the DIY garden shed kit, the ground would still have to be levelled and the rubble removed. It is prudent to install a weed-proof membrane before placing the shed’s base to prevent weeds and grass from growing and damaging the floor and walls of the shed.

Putting the Base for Your Garden Shed

There are many ways you can create the base for your garden shed. Some of them are as follows:

  • Concrete Base: If you intend installing a concrete base, make sure it levelled, flat, and dry before you erect the shed. Use string and pegs to mark the area where you want the garden shed. Dig a hole, about 15 cm deep, and place a wooden framework into which you will be pouring the concrete. Place a layer of stone, about 7 cm and then pour in the cement concrete mix. Spread it out evenly, level it, and let it set.
  • Garden Paving Slabs: If you don’t feel like pouring concrete in your garden, go with garden paving slabs. This too requires you to remove about 7 cm of the topsoil. Then add 4 cm of cement and place the garden slabs on the wet cement. Let the cement dry, so that the slabs are firmly fixed and then erect your garden shed.

Mistakes to Avoid When Erecting Your Garden Shed

Some homeowners make mistakes when they prepare the ground for the new shed. This can result in damage to the shed and also be dangerous for you and others. Some mistakes that you should avoid making are:

  • Unstable base: Refrain from laying garden slabs on loosely arranged gravel. This will not create a stable base for your garden shed and can result in the wood warping and getting damaged. Remember, you are using a DIY garden shed kit and hence, it is necessary, you make the base firm and stable for your own safety. Think of your house, would you want your house being on a weak foundation?
  • Not clearing rubble: If you don’t clean the rubble, garden debris, dead leaves, and garden detritus from the ground, you will not have a hard-standing base. It is important you clear the ground completely before you start laying the base for your shed.
  • Not using weed-proof membrane: Timber decking base is often the preferred base, as it gives the shed a more natural appearance. However, if you intend using a timber decking as a hard-standing for your garden shed, make it a point to first clear and level the ground and then place a weed-proof membrane between the ground and the timber base.
  • Using dirt, lawn or gravel for the base: Never attempt to erect your garden shed directly on bare ground, gravel, or lawn. This could damage the wood panels due to moisture from the ground and also lead to warping and subsidence.

DIY garden shed kits come with pre-cut Western Red Cedar wood panels. This means you will not have to spend time cutting the wood and making holes in it. The kit has illustrated instructions along with the necessary hardware. However, you will need another person to help you assemble the pieces and erect the shed. And, all garden shed kits will recommend installing the base. So make sure you educate yourself on the different types of bases that can be used with your shed and then select one that best suits your needs and budget.

Remember without ground preparation, you risk damaging your garden shed and also causing injury to yourself and others, as the shed may not be as sturdy as you think it is. So prepare your garden first before you erect your shed. Choose the location carefully and then prep the surface the right way to enjoy the benefits offered by a garden shed. Don’t be afraid to ask for some help. You do not want your shed slowing falling apart in the years to come. That will just invoke one conversation after another that you do not want to have with anyone who sees it.

Read More
Stain Your Shed or Playhouse So you have decided to stain your shed or playhouse from Outdoor Living Today.com. Western Red Cedar has a reputation for holding finish exceptionally well, and for good reason too. After all, Western Red Cedar is pitch and resin-free and is usually milled with a rough finish. This means there’s nothing to interfere with the bonding of your finish and stain adherers to the rough fibers of the wood better. Here are a few tips to help your shed or playhouse stay beautiful for many years to come.

Before Your Shed/Playhouse Arrives

Western Red Cedar will actually start to weather to a silvery-grey even 3-4 weeks after being exposed to the sun. If you want to keep your product looking “new” and you can’t assemble your unit for some time after it arrives, make sure you cover the unit and protect it from the elements until you can get at it. If you have enough garage space available, that could be an ideal location – sheltered from the sun and also dry and safe. Consider clearing out additional garage space to store if possible.

After Your Shed/Playhouse Arrives

When your OLT product arrives, it will either be unloaded with a power tailgate to the ground on a contained pallet or off-loaded piece-by-piece by you and some helpers. If power tailgated down and you can’t get at it immediately, request the driver pallet jack the entire unit in that great space you made in the garage. Shipping companies sometimes can’t accommodate you but always ask! If the unit is left on your driveway, try to pick a spot not always in direct sunlight if possible. Either way, remove the protective plastic cover from the unit and cut the plastic banding holding the entire unit together. This will let the unit breathe to reduce moisture from the wood which will be great when you stain later. Consider removing various pieces from the package so they can start to dry and slowly reach the moisture equilibrium in your area. If your unit is hand offloaded from the delivery truck, sort pieces according to assembly section such as floor, walls, roof and trim. This will make it easier to locate pieces later and also get a game plan for what can be stained before and after assembly. If pieces are left outside, be sure to cover if exposed to direct sunlight or moisture for any period of time.

Stain Choice

Walk into any home do-it-yourself paint and supply store and you’re bound to be inundated with finish-stains. These products provide protection and also dress up the wood’s surface, enhancing cedar’s natural colors and textures or changing its face altogether. Three common choices are solid-colour stains, semi-transparent stains, and transparent stains. Solid-colour stains act as a barrier between the elements and the wood, forming a film around the wood. Semi-transparent stains are ideal when you want to maintain western red cedar’s natural finish without weathering. Semi-transparent stains penetrate the wood’s pores, to varying degrees based on product. Transparent stains enhance the wood’s colour and act as an invisible protectant. We here at Outdoor Living Today.com have experimented with many name brands, and in our opinion, a couple have stood out: Cabot Stain and Sikken’s. Both of these companies offer an opaque stain as well if your desire is to ‘color’ your shed. Expert Advice – bring a sample of cedar from the package and test the color so you know exactly what it will look like after you stain your shed or playhouse! The bottom skirting trim supplied with your shed/playhouse is a great piece to try this with. Test various stains and colors on the inside of the skirting. These won’t be seen when the assembly is complete, and will help you decide on your stain choice a lot more definitively than some arbitrary ‘color guide’ on a sample rack.

When to Stain Your Shed or Playhouse – Before or After Assembly?

There are many benefits to staining pieces of your shed or playhouse prior to assembly and some negatives. Staining pieces before assembly allows you to work in a safe, comfortable position. It has the added benefit of allowing you to apply a finish to all sides of your wood before installing it, thus ‘protecting’ every surface of your shed or playhouse. A good example of pieces we recommend staining prior to assembly would be the roof panels, filler shingles and roof ridge caps. The inside roof panels do not need to be stained! These pieces are much easier and safer to stain on saw horses. The entire trim kit can also be done prior to assembly. One negative is you will probably use more stain and it may take longer to complete the job as opposed to staining after you assemble the entire unit.

Brush versus Spraying?

While it may be easier and quicker to stain your shed or playhouse with a paint sprayer on certain components such as the walls and roof panels, we still recommend you brush the stain in after spraying to get an even and penetrating coat. Conditions must also be right (temperature and wind) if using a sprayer so with that said, a brush will most likely be your most effective tool. The brush is also very effective on wall siding and end grains of trim pieces. Using a brush will give you the most control. Brush application (natural bristle) is the preferred method because it works the stain into the wood fibers and cells more effectively. To avoid lap marks, make sure that the leading edge is kept wet and that the wet stain is brushed into the wood. A very good method is to brush the stain over an area, and then follow up with a sponge to catch any puddles or drips. Any stain left to sit on a surface will soak in more than surrounding areas and appear darker. Work in small manageable areas. Try this technique: brush with one hand, and a sponge in the other. Brush an area with the stain, and follow up with the sponge if there are drips and puddles. It won’t take long until you have developed a rhythm and the job will be done in no time. While stain brands recommend a drying time of 12 to 24 hours, allowing the cedar to dry between 24 and 48 hours ensures that it is completely dry before you handle it for assembly. There’s always the low-maintenance option of letting your western red cedar outdoor projects weather to a beautiful silver grey. But if that doesn’t suit your personal palette, follow these tips when you decide to stain your shed or playhouse for a beautiful finish that will last for many years! Enjoy your Shed or Playhouse from Outdoor Living Today.com!
Read More
Decorative garden shed A garden shed is a often used to store gardening equipment and yard tools where they are needed. However, you can also build a decorative garden shed and make it part of the landscaping and design element of the garden. To make the garden shed a focal point of interest in your garden, you need to make it attractive and match the landscaping design of your garden. The best way to do this is to build a basic garden shed and customize it or decorate it with a bird house on top, a living roof of moss or other plants, allocate part of the shed for a greenhouse, rabbit hutch, or chicken coop. You can incorporate multiple variations on the basic theme.

Choose the Location for Your Decorative Garden Shed

To build the garden shed, choose a fairly level spot of ground in a well-drained area. The ground need not be perfectly level and any difference in depth can be compensated with differing lengths of the vertical posts used. The garden shed can be built on the thin top soil, doing away with the need to dig for the foundation.

Placing the Precast Concrete Blocks

Once you have cleared the ground for the garden shed, place the precast concrete deck blocks at the right places. These blocks should be placed at the four corners as well as along the sides. The longer eight foot side should have two or three blocks while the shorter six foot sides should have one block placed in the middle. Now place a 12 inch piece of 4×4 lumber into the central recess of each concrete block. The lumber will protrude slightly above the block.

Building the Frame

Now take the 2×6 that will form the outer edges of the frame and place them on the concrete blocks such that they align along the outer edge of the 4×4 lumber already placed in the central recess of the concrete blocks. Trim all the excess 4×4 such that they are flush with the top of the 2×6 you have laid alongside them. You are now ready to add the floor joists. These should run between the two longer sides of the shed, the 8 foot sides. The 2×6 floor joists should be fixed to the outer edges of the floor frame using screws. You also need to add three three and a half inch deck screws into each joint. Now install the pressure treated plywood subfloor over the frame. This can be five eights of an inch thick. This should be secured using 2 and a half inch screws that are placed every six to eight inches.

Building the Walls

To build the walls, you need to fix 2×4 wall plates horizontally using vertical wall studs. The top and bottom plates are connected using the wall studs. The shorter walls are placed within the longer ones. The walls are secured using 3 and a half inch deck screws. The wall studs should be 24 inches apart. The walls should be fastened to the deck using four inch deck screws. The screws should sink into the 2×6 floor frame for best results. Now you can add a second layer of wall plates, ensuring that they overlap at the corners. The walls can be completed by covering the frame with sheathing.

Window and Doors

When preparing the walls and the studs, you need to also mark the location of the doors and windows. These can be of any size, permitting you to reuse any available doors or windows. The door hinges can be attached directly to the wall, while most windows need a frame.

Cutting Windows and Doors

Once the wall has been installed and the siding covers the entire exterior, you should cut the windows from the interior using the window frames for guidance. This will save you the hassle of trying to cut the window openings on the sidings apart from the wooden frame

Roofing

Instead of cutting rafters to size, you can use steel connector plates made especially for roofing. These will also make the roof stronger. Now cut the rafters to the appropriate lengths from 2 by 4 lumber and bring them up at a 30° angle at the top of the roof. Connect them using the steel connector plates. Now cut triangular pieces of siding to make the gable walls and fasten them to the roof and walls using nails. Cut pieces of 2 by 6 blocking to fill the gaps between the rafters and the top of the walls. Otherwise rodents and birds will find a way into the garden shed. Once you have the rafters in place, you can cover it with half inch roofing plywood. This can be extended over the rafters to create an overhang if needed. This is just icing on the cake.
Read More
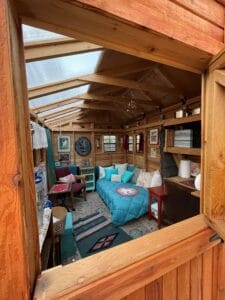
She Shed Man caves are passé. The fairer sex now are getting their creative juices going to design their own personal spaces. Apparently the inside of the entire home was not enough! After all and furthermore, it’s not only the men who need the peace and quiet of a retreat. Fueled by the popular interest generated on Pinterest women all over are excited by the idea of a “she shed”. It’s the perfect place to get away from the drill of daily chores and family responsibilities. A little time out helps to recharge your batteries, clear your mind, and boost that motivation before getting back to the grind. Your backyard shed need not be a just old room that you generally use for storage anymore. “She sheds” are a fantastic reflection of your personality. Your imagination is the limit to create a place that defines you. There are endless ways to let out your girly decorating fantasies that you couldn’t fulfill in your house. It’s not about running away from anything, everyone needs time for themselves and women running a family hardly have any time or space of their own. The basic idea is that no one except you is allowed in. Some women find that having this little hideout helps them emotionally and gives them a sense of stability and control. It’s no surprise as it provides an opportunity to pursue their interests. It’s a fantastic thing in a world where so many compromises are made by women for the sake of family.

What You can do in Your She Shed/Ma-Am Cave

Use your imagination to convert it into your perfect getaway. If you are artistically inclined or you work from home or take up projects, you can use it as a place to focus and get into the zone. If you are a painter you can use it to make a gallery of sorts and house all your artwork as well as use it as a painting space. Stock it with books if you are a bookworm and escape into the literary world. Some people have chosen to use their backyard sheds as eateries and pubs. It’s also a fantastic place to just chill out with a cup of tea, or some wine if you prefer, and unwind. A rendezvous with your old girlfriends can be so much fun here. Some women just use it as a place to find peace, meditate on the questions of life, and find their old selves. What you use your shed for is totally your choice. The best part is that you have your retreat a stone’s throw away. She-Shed-conversion

Use Your Imagination

Always wanted to decorate your room in pink and lace but found it too girly for the tastes of your family? If you are a DIY aficionado then you will love doing up your shed. Freedom to decorate is completely unhindered. Paint it white for a Victorian look, personalize it with memories from your past, reuse and give new life to old unused furniture. This is this perfect opportunity to go green and recycle all those odd things lying around. Love gardening? Cover it with flowering creepers, put pots of flowers on the window sill, and make a nice walkway leading to it. Paint the walls, hang lanterns, and wind chimes, light it up with some soft golden lighting. The whole idea is to let yourself loose and create a blissful haven for yourself. Think your old shed is too worn out? Think again. Old sheds are brilliant chance to bring out that rustic look. All it needs is a little sprucing up. Install large windows and paint them white. Plant some bright tulips or the like around it. Build a sit-out and hang out some lamps. Have a bird bath. If you need any ideas, take inspiration from what other people have done but toss in some of your own ideas as well.

Getting Started

You are lucky if you already have a backyard shed. Now all you need to do is to set it up to your liking. Giving it a fresh coat of paint is what makes it come alive again. Decide what you would like to do with the space and have a wonderful time decorating it. You can always build your own backyard shed. There are a lot of DIY shed options available. Your shed need not be made only out of wood. Having a glamping tent is a sterling low cost alternative to the shed if your budget is tight.

Happy Times

These sheds make a magnificent place to host an outdoor party from. It provides the perfect ambiance for birthdays, anniversaries, and family gatherings. It’s a majestic place to enjoy your garden from as well too. Spend evenings here watching the rain with some biscuits and tea or just staring out of the window. Make it your own happy place. Sort of like those magical places we always read about. “She sheds” are not really meant as a response to man caves. It just fulfills a very real need for women to tune out of the stress of everyday life.
Read More
Converting-Existing-Garden-Structures-into-a-Playhouse As your children grow older, they require some space away from you to develop their independence and creativity. While you need to ensure that you are not stifling them with over protectiveness, you also need to ensure that they are safe. One way of doing this is building a playhouse in the garden for your children. This will let them play independently while having some protection from the elements.

Repurposing Existing Garden Structures

While a playhouse is a terrific idea to provide children with their own secure space, most homeowners have space and budgetary concerns about this. One way to overcome the problem is to convert an existing garden structure into a playhouse. You can convert any garden structure such as the garden shed, gazebo, or arbor into a charming playhouse for your children.

Check the Sturdiness of the Structure

Before you begin the conversion process, you need to check the sturdiness of the garden shed, arbor, or gazebo. Check that the foundations, walls, and roof are strong and can handle vigorous play by the children. If there are problems, reinforce the foundation, walls, or roof to ensure that they are strong.

Ensure Adequate Ventilation

Since the children are likely to spend a lot of time playing in their playhouse, you need to ensure that it has adequate ventilation. You also need to ensure that it can be weather proof if needed to ensure that the children’s treasures, toys, and other possessions are not damaged by moisture or exposure to sunlight.

Paint the Interiors and Exteriors

Next paint the interiors and exteriors in washable paint. Choose bright and cheerful colors and trim to make the playhouse stand out in the garden and appeal to the children.

Provide Furniture

Depending on the size of the room, the number and age of the children who will be suing the playhouse, place suitable furniture. These can be low chairs and benches as well as tables. If possible, include seating and other furniture that can be cleaned easily and also double up as storage. A chest for toys can also be used as a table or seating if needed, ensuring that the small space is well used. You can also use child size furniture that will make the place more comfortable for the children. When putting in furniture for the playhouse, make sure to include individual storage areas for each child.

Add Furnishings

Once you have placed a few pieces of furniture in the playhouse add furnishings. This can include curtains, a rug or two, and a few colorful cushions.

Decorate the Exteriors

Once the interior has been fixed and decorated, you need to decorate the exterior. As the playhouse is situated in the garden, you can cover it with growing vines, place flowering plants around it, and so on. Another incredible way to make the playhouse appealing is to install a short wooden picket fence around the playhouse and place a swing or hammock in the garden.

Convert an Arbor into a Playhouse

To convert an arbor into a playhouse, ensure that there are plenty of vines growing up the walls and roof of the arbor. Create a green wall on three sides of the arbor, by either using vines trained on trellises or by planting a tall hedge along one side. Leave space for a doorway. In the interior of the arbor, place a few benches or chests that can store toys and double up as seating. Cut a few window openings in the walls of the arbor to let in light and let your children enjoy time in the arbor. You can spread a canvas sheet on the floor of the arbor to keep the place clean. Well, that will enable cleaning more easily at least since the canvas sheet can be swept.

Convert an Gazebo into a Playhouse

A gazebo can also be converted into a playhouse or play pavilion by hanging cheerful curtains or blinds along the sides. This will provide a cozy and covered place for the children to use in the summer. As the gazebo is likely to have some seating space, just include a set of lockers for each child and provide your children with hours of fun in their own space. Make sure they lockers are tight so no bugs can gain access to them. Providing a playhouse for your children will enable them to become more independent and creative while you can enjoy quiet time indoors or in the garden. Any existing garden structure can be converted into a playhouse by adding furniture that provides both seating and storage and a few rugs and cushions. The cushions can have bugs on them if left overnight so this option is up to you. Before you furnish the playhouse, you do need to check that the structure is sturdy and that there are no sharp edges or ledges that can injure children when they are playing. A playhouse with very basic furniture will encourage the creativity of your children since they can convert it into whatever they wish – a castle, a ship, theater, Optimus Prime, and so on.
Read More
Creative-Ways-You-can-Use-a-Garden-Shed If you are tired of seeing your cluttered garden shed being used merely to store items that you haven’t quite found a place for in your garage, it may be time for a change. No matter what size your garden shed is, you don’t need to use it to horde gardening tools or Christmas decorations. With just a little bit of time and effort, and not a lot of cash, you can turn your garden shed into a truly unique and creative space.

But first…

The first and foremost rule to turn your garden shed into something new is to organize your shed, and to clean it out of all the junk that has been sitting in it for years. Be brutal about the process, and don’t hold onto something useless just because it has sentimental value. If you haven’t used an item in the last 6 months, it’s time to give it the old heave-ho! Once you have an empty garden shed, you can move onto the next step. Here are some amazing ideas on how you can use your garden shed creatively:

As a playhouse for kids

If you have kids, you can convert your garden shed into a wonderful space for them to play outdoors. Create a playhouse for your kids by painting it a bright color, adding tables, chairs, toys, a blackboard and other such items, and watch your kids marvel at your creation.

As an indoor greenhouse

indoor-greenhouse-753x1024 You can use your garden shed to create your very own indoor greenhouse for all those delicate plants that cannot thrive in the harsh sunlight. All you need are a few troughs, a watering system, and you’re all set!

As an art studio

If there is a budding artist in you, waiting to burst forth, why not give them their own special spot to let their creative juices flowing? An unused garden shed is the perfect place to build your very own art studio, away from the distractions, hustle and bustle of your main house.

As a gym

Let the fitness freak in you a little push by converting your garden shed into a DIY gymnasium. You may tell yourself that your gym is too far off so you can’t make it, but when it is in your backyard, you will have no excuses.

As a home spa

With this salient idea, you will never have to spend tons of cash on professional spa services. Turn your garden shed into a home spa! Add an inflatable pool that doubles up as a hot tub, light some scented aroma candles and get set for max relaxation.

As a workshop

If you or your significant other is quite the DIYer, you will love the idea of turning your garden shed into your very own workshop. Set up racks for all your tools, install a sturdy work table and hammer away, without disturbing the rest of the family.

As a game room

What’s not to love about this amazing idea? A game room is a marvelous place to relax for the boys or the girls. Set up a pool table or a foosball table, a comfy sofa or beanbags, if space is at a premium, a fridge or a mini bar for your beer, a music system and you are all set to entertain guests.

As a garage for your bikes

You don’t need to be a Hell’s Angel to love this idea. If you are a bike-enthusiast, why not consider converting your beat-up old garden shed into a sweet resting spot for your bikes?

As a home office

A garden shed may not provide you with as much space as your actual office does, but it sure does provide you with the privacy you need when you’re working from home on that important brief. This way, the chaos of your home won’t affect you or hamper your concentration.

An outdoor pub

If you want to add a little twist to entertaining guests, why not lead them to your outdoor pub? Set up a bar counter, stock it with all your favorite drinks, and get set to put that cocktail shaker to good use.

As an observatory

If you love looking up at the night sky, this idea is definitely going to impress you. Get your telescope ready, rig the roof of your shed to either open up, or install a glass roof and you are ready to check if there’s anyone out there wanting to make contact. Maybe it is Optimus Prime! If it is Galvatron, you have some issues!

As a hobby hut

No matter what your hobby might be, whether it is arts and crafts or crochet, you can use your garden shed as the perfect hobby hut. A garden shed is tremendous since it is big enough to store all your gardening supplies such as rakes, shovels, hoes, plant seed, and so on, and small enough to offer you that private space you need.
Read More
how-to-winterize-your-shed A shed is usually a structure to have in your garden. While your garden shed can withstand and endure spring, summer, and fall effortlessly, it does require some help to endure the harsh winter months. You will be using your garden shed less in the winter and hence, you will not know of any seasonal damage until spring. So it is an astute idea to winterize your shed, so that it stays sturdy and pristine during the winter, ready to welcome you when spring arrives in all its glory. So how do you winterize your shed? Are there some special measures that you need to adopt? Yes, there are few things you need to do in the fall to help prop up the shed for winter.

Thorough Cleaning

Your shed becomes a place to store everything, from pots, lawn mower, fertilizer, mulch, garden hose to gardening tools, and accessories. Before you decide to shut your shed for winter, it makes sense to organize your shed. Otherwise in the spring you will find critters and varmints enjoying themselves. Also, when you clean the shed and everything inside it, you can be spring ready.
  • Remove all the things outdoors to sort out what you need and what has to be disposed. Broken pots, spare parts and some extra materials, and other damaged items that can’t be used or that is needed should be discarded.
  • Sweep the floor and remove any cobwebs. Get rid of insects that may have made their home in the shed in the summer. Use poison if you have too.
  • Clean the gardening tools properly and store them in plastic bags, so that you have them ready for spring.
  • Empty out the contents of the garden hose and then roll it to store away properly to prevent it from cracking or getting damaged in extreme temperatures.
  • Remove oil and gas from the leaf blower, lawn mower and trimmer. Cover them with a tarp to prevent moisture and dust getting to them.
  • Place potting soil, fertilizer, mulch, and grass seed in individual plastic bags and secure them. This will keep rodents from nesting in them and doing even worse things.
  • Oil, thinners, fuel, and paint should be disposed in an environmentally-safe manner. So call a local disposal company to do that on your behalf.
  • Secure the electrical cords to each electrical tool to prevent them from getting entangled with other things.

Inspect and Repair the Interior of the Shed

Interior-of-Shed-WallsWhen you empty out the shed and after you finish cleaning the floor and walls, it is time to inspect the interiors of the shed and make necessary repairs. Check the floor, ceiling and walls carefully. If you notice holes and crevices, use caulk to fill them in. This will prevent pests from getting inside your shed in winter. Look behind shelves, hooks and other wall-mounted hangings for damage. If you notice anything, repair it immediately. Carefully check the seals around windows and doors. If you notice cracks or damaged weatherstripping, replace it. Otherwise, cold air and moisture will make their way into the shed. Oil the door hinges, so that they function optimally even during winter. If you have the energy and money, give the walls a fresh coat of paint to renew the appearance.Waterproof the floor to enhance its longevity if you intend using winter tools. The wet tools can damage wooden flooring.

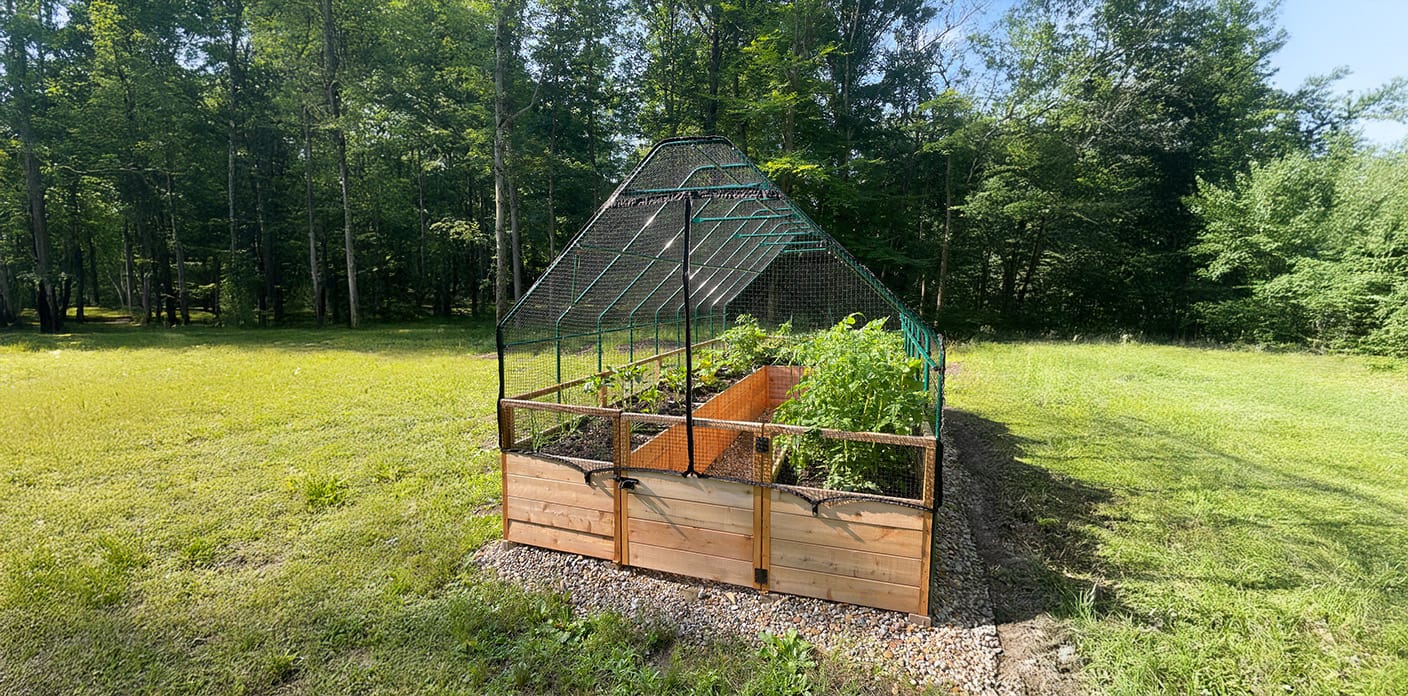
Give the Roof Special Treatment

The roof of your shed also requires TLC. Remember, it will be exposed to strong winter winds and snowfall (depending on where you live). It should be sturdy enough to withstand the elements and keep moisture away from the interior.
  • If the shed has metal roof, there will be areas that are rusted. Clean the roof thoroughly and rustproof it.
  • Shingled roof also requires proper maintenance to prep it for winter. Replace loose shingles and replace any that is broken.
  • If you have a wooden roof, look for wood warping, boring insects, and cracked panels. You will want to replace panels that are damaged and also treat the wood to prevent insects from boring into it. Western Red Cedar panels that are often used in DIY garden shed kits are naturally resistant to pests and are awesome for outdoor sheds.
  • Replace rusted nails and reinforce loose panels properly.
  • Trim overhanging branches from trees, as they can damage your garden shed once they get heavy with ice and snow.

Fix and Repair the Exterior

Check the exterior of your shed carefully. Look for holes and crevices and fill them up. If you like, you can paint the exterior with waterproof paint to protect it from moisture. Remember, if you are painting, let the paint dry properly between coats. Remove growth from around the shed as efficiently as possible. Use these tips to winterize your backyard shed. It may sound like a lot of work, but if you plan on doing a little bit every day, you should have your garden shed ready for winter within no time. Winterizing your shed will boost its longevity and you will not have to worry about repairs (or profound ones) when spring arrives.
Read More
“She sheds” allow women to escape to their own personal private retreats, without leaving home. A quiet place where women can leave their stressful lives at the door and take part in activities that they enjoy.

What is a “She shed”?

A “She shed” is a separate room detached from the home about the size of a large shed. Like the man cave, “She sheds” are intended to offer a room one can escape to; a quiet place for women to leave their stressful lives at the door and enjoy their favorite activities. However, unlike the man cave, the “She shed” is designed for women. While some women transform their existing backyard sheds into their private retreat, others chose to buy a DIY shed kit to create the “She shed” of their dreams. For a quick overview of how women use “She sheds”, check out the infographic below. She-sheds
Embed This Image On Your Site (copy code below):

What can you use your “She shed” for?

The opportunities of what you can do with your “She shed” are countless. Women have been customizing their “She sheds” into a dream office, tea room, art studio, music studio or even yoga studio, or simply a place to enjoy a glass of wine with your friends. There is no need to have everyone in your house when you entertain! The “She shed” is another extension of your home. It adds another dimension. Decorating a “She shed” is fun. She Shed Kits mean you don’t need to spend a fortune – the main idea is to create a space that feels relaxed and cozy. Flea markets and antique shops often offer unexpected finds. Relaxing in a “She shed” is very different from sitting and reading in your house, where you’re inevitably looking around thinking to wash the windows, do the laundry, dusting – a never ending list. In a “She shed” don’t have those distractions.

Why build a “She shed”?

“She sheds” are an affordable way of adding on to your home. They are fast to build, and can give women the peace, quiet and privacy that they need. There are many shapes and styles to choose from – rustic, urban modern, playful – and some owners even add more comfort by installing upgrades such as air conditioning, skylights, custom windows and doors…everything but plumbing.

A woman’s space – The history

The idea of women having a private dwelling space dates back hundreds of years to what was once called a Bower. Nowadays, professional women with home based businesses attribute “She sheds” directly to their success as they help balance work and home life. A stunning 80% of women would like to have their own “She shed”. 51% of people think of a man cave as a space with technology and darkness versus 37% of people who described a “She shed” as a pretty, light room dedicated to work and relaxation.

What size should I build and what material?

Always check with your city for permit requirements. Many places allow shed-sized backyard structures without a building permit. Simply make sure that you stay within the permitted setbacks and height limits. If you are planning on having electricity in your “She shed,” then a permit for electrical wiring is probably necessary. As for materials for your “She shed” go with real wood, not plastic, steel or chipboard. Cedar is an excellent choice – not only for looks.

She Shed Kits or Conversion? How do I get started?

Here are seven steps to creating your own “She shed”: 1. Clean out your old backyard shed—or get a cedar-shed-kit to build a new one. 2. Give your shed a fresh coat of paint or stain. 3. Define the purpose of your shed. 4. Search flea markets and antique shops for unique finds. 5. Surround yourself with nature. 6. Create an inviting entryway. 7. Make sure your shed is a reflection of yourself.
Read More
Being in the garden can bring us a feeling a profound connection to the land. In this age when we seem to always be “connected” to our smartphones and other devices – it’s sometimes good to “unplug” and ground ourselves in activities that connect us to our true sense of ourselves. There’s a well known expression, that gardening is good for the soul. Research also demonstrates that it’s also good for the mind and body. In fact, gardening is a gateway to well-being, benefitting everyone from children to seniors. For me, it just makes me feel better about life. Need inspiration? Just contact us or have a look at the many pictures sent to us. Create your own backyard gardening oasis at Outdoor Living Today. the-Garden-Shed
Read More