No products in the cart.
November 20, 2014
How to Prepare Your Site Before Your Shed Arrives

Installing a new shed is an exciting project — but proper site preparation is key to a smooth installation and long-lasting durability. Whether you’re setting up a garden shed, workshop, or playhouse, following these steps before your shed arrives will save you time, effort, and costly mistakes.
✅ Step 1: Read Your Shed Assembly Manual
Before you start any work, carefully review your shed assembly instructions. Determine whether you’re comfortable tackling the build yourself or if you’d prefer to hire a professional contractor.
Pro Tip: Some regions require a building permit for shed installations. Always check with your local municipality or county for permitting requirements before you purchase your shed.
✅ Step 2: Clear and Prepare the Site
Make sure the area where your shed will go is clear of all debris — this includes grass, roots, rocks, and other obstacles. A clean site is essential for a level and stable foundation.
To ensure proper drainage:
The ground should slope away from the site in all directions (ideally 1/8″ per foot).
If needed, build up the soil in the center and grade it outwards.
Fill any low spots to avoid water pooling.
In areas with poor drainage, excavate 4–6 inches deep and lay down gravel or crushed rock to keep water from collecting beneath your shed.
Choosing the Right Shed Foundation
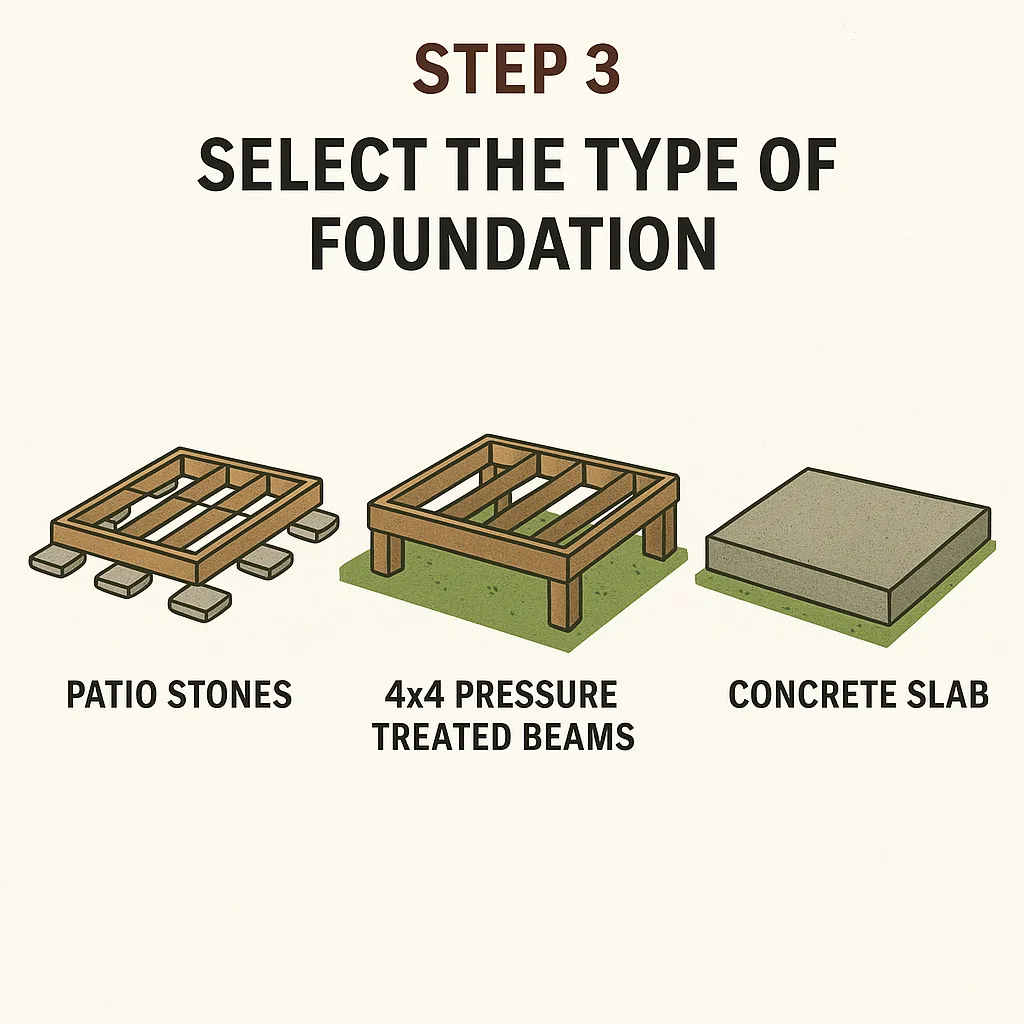
The type of foundation you use will depend on your site conditions, budget, and shed model. Below are the three most common types of shed foundations we recommend at Outdoor Living Today.
🪨 1. Patio Stone Foundation
Ideal for well-draining, stable ground.
How to build it:
Excavate the area 4–6 inches deep and about 12 inches wider than your shed’s footprint.
Lay 1–2 inches of sand, then fill with 3–4 inches of gravel.
Use patio stones (round, square, or rectangular) placed under each floor runner — about 4–5 stones per runner.
Ensure everything is level before installation.
🔧 Most of our sheds come with built-in floors and runners, making patio stone foundations a quick and cost-effective solution.
🪵 2. 4×4 Pressure-Treated Beam Foundation
This is a more permanent option and works well for uneven or sloped yards.
Instructions:
Excavate and prepare the site as above.
Lay pressure-treated 4×4 beams perpendicular to the floor runners.
Use a long, straight 2×4 and a level to check your grade.
Drive ½” rebar through pre-drilled holes to anchor the beams into the ground.
Leave open ends for ventilation and cover with wire mesh to deter rodents.
🧱 3. Concrete Slab Foundation
Best for year-round durability and heavier structures like workshops or large storage sheds.
Basic steps:
Excavate the slab area to 6 inches deep.
Lay a 4-inch sub-base of crushed gravel.
Pour a 3–4 inch concrete slab over the gravel.
📐 For an 8’x12’ shed, you’ll need approximately 1 cubic yard of concrete.
Still Have Questions?
Whether you’re prepping for a DIY shed kit or a larger project, our team is here to help. For more details on shed foundations, building permits, or assembly tips:
📞 Call our Customer Support Line at 1-888-658-1658
🌐 Or visit www.outdoorlivingtoday.com for how-to guides, video tutorials, and inspiration.
Ready to Start Building?
Explore our full selection of Western Red Cedar Shed Kits — built to last, easy to assemble, and perfect for any backyard.


