Get your garden shed ready for winter! A garden shed is no longer a luxury. It is a necessity that allows you to enjoy more storage space for your gardening tools and implements rather than using your garage for storage. You can easily invest in a panelized garden shed that you can erect yourself. Not only is such a shed aesthetically pleasing, it also is quite functional.
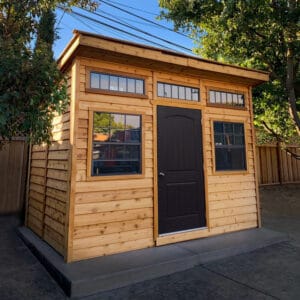
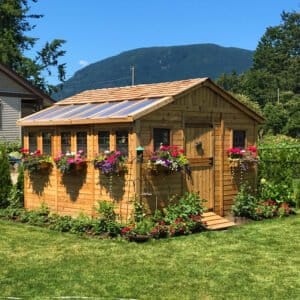
DIY panelized garden sheds come with pre-cut panels that already have Western Red Cedar shingles attached to the roof panels. Each panel comes in a manageable size, so that it is quick and easy to assemble the shed. You also have the flexibility to choose a window and door panel placement.
However, once you have your garden shed in place, it is very easy to let it turn into a huge mess. You may end up just throwing everything into the shed and forgetting about it until the need arises. Then it is one big clutter that you have to weed through to find what you need. Don’t let your garden shed fall into this state. Work on it now to prepare your shed for winter and beyond.
Clean and Sweep
Take out everything from the shed and keep it outside. Then sweep the shed to catch all the dirt and debris. Wash and rinse pots, wheelbarrow, shovels and other gardening tools and implements. Use a wire brush to get rid of stubborn soil stuck to the surface. Let the tools, air dry. Once they are thoroughly dry, store them away until you need them again. You can spray the metal parts of the tools with a lubricant to prevent rust formation.
Spruce Up the Shed
If you install a garden shed made from pre-cut Western Red Cedar, you don’t really need to paint it. This wood looks beautiful naturally and has its own charm. However, you can stain the floor of your shed, if it is made from wood. Use a weatherproof stain to keep the floor looking gorgeous all year long.
Also, check for holes and cracks in the panels. If you find them, use caulk to fill them up. You also can fill the seams with caulk to keep the cold wind out and prevent your shed from smelling musty when you don’t open it for days in winter.
Keep Pests at Bay
Garden sheds seem to attract pests very easily. Bugs and rodents love to make homes in garden sheds. These critters can create a mess and stink up your shed. So set traps throughout the year to deter these pests and ensure your garden shed lasts for decades and also remains in magnificent shape.
Organize and Store
Check all the items that you store in your garden shed. Discard anything that is broken and you no longer need. Garden sheds can accumulate a lot of clutter every season and you may not even realize it until you are trying to find that one tool or implement that is hidden under the chaos.
Once you have got rid of unwanted and broken items, it is time to focus on the storage. The best way to optimize storage in your garden shed is with shelves and hooks. Fix large hooks on the inside wall to hang large tools and implements, such as shovels, trowels, and rakes. You can even roll up the garden hose and hang it on the wall, thereby using the space vertically inside the shed.
It is important to use shelf space prudently. Anything that is small and organic, such as mulch or dirt should first go into waterproof packaging and then onto the shelf. This will prevent the shed’s floor from damage. Similarly, pots, watering cans, fertilizer, and herbicides should also go onto a shelf. Make sure you label the shelf, so that you know what goes where. Place other small items in transparent plastic boxes with lids. Label the boxes on all sides, so that you know what they are for.
Place these in a systematic manner on the shelves. Boxes that hold items you need regularly for your garden maintenance and upkeep should be placed on lower shelves, while those you use sparingly or rarely should be placed on higher shelves.
Your wheelbarrow should be propped up against the wall, so that it is not in the way when you enter the shed. The things that you own can be a nuisance if they are constantly getting in the way and so on.
Neaten the Outside
Clear grass, shrubs, and other plants growing along the garden shed. They can damage lower half of the shed. You should be looking to keep about 3 to 5 (7.62 to 12.7 cm) inches of space between the garden shed and your plants to prevent damage to the lower part of the shed and its base.
A garden is a green oasis in a concrete jungle and a garden shed allows you to keep that oasis beautiful and well-landscaped. So, organize and clean up your shed to store all the valuable gardening implements and tools that you need to make your garden into a haven. It is worth the effort and time!
-
 On SaleSale!%Off10Save $659659$10%659$On SaleSale!%Off10Save $708708$10%708$On SaleSale!%Off10Save $958958$10%958$On SaleSale!%Off10Save $833833$10%833$On SaleSale!%Off10Save $777777$10%777$On SaleSale!%Off10Save $958958$10%958$
 -
 On SaleSale!%Off10Save $1,0691069$10%1069$On SaleSale!%Off10Save $951951$10%951$On SaleSale!%Off10Save $881881$10%881$On SaleSale!%Off9Save $1,0001000$9%1000$On SaleSale!%Off10Save $951951$10%951$On SaleSale!%Off10Save $881881$10%881$On SaleSale!%Off10Save $1,0691069$10%1069$
 -
-
 On SaleSale!%Off10Save $459459$10%459$On SaleSale!%Off10Save $459459$10%459$
 -
-
 On SaleSale!%Off10Save $571571$10%571$On SaleSale!%Off10Save $571571$10%571$
