History Of Imitation Products In North America

In 2005 companies across North America started to import wooden products in bulk from China which was originally marketed as “China Fir”.

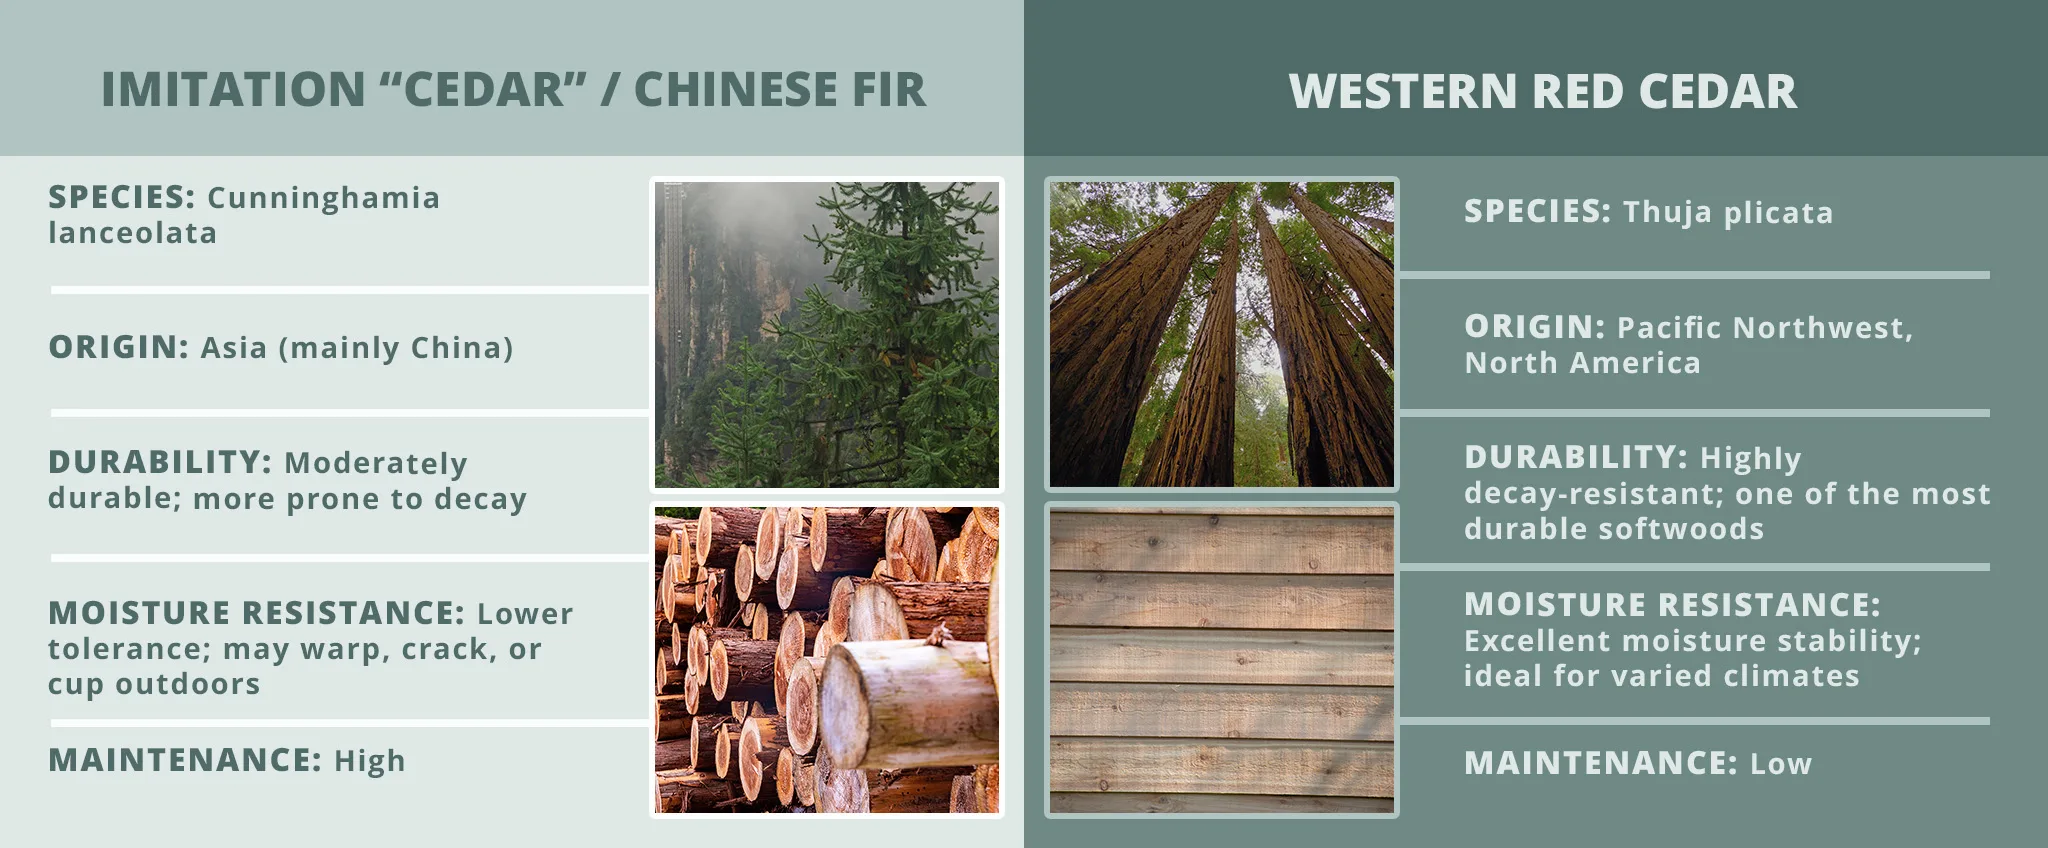
China Fir (Species: Cunninghamia Lanceolata) was later marketed as “Chinese Cedar” to piggyback off the reputation of Western Red Cedar and other North American Cedar products.

In 2022 most of these products have ditched their association with China altogether and now simply refer to the products as Cedar. These products, however, are not Cedar, nor are they comparable to the quality of Western Red Cedar and other North American Cedar Products.

These labeling tactics are designed to confuse consumers into thinking they are getting a quality product comparable to Western Red Cedar, as well as devalue authentic Cedar lumber mill owners and employees across North America.

If you see a product with a generic “Cedar” label, and a substantially lower price with no specificity, it is safe to assume that it is a Fir (Species: Cunninghamia Lanceolata) from China instead, and you can value it accordingly.

If you are however, looking for quality Cedar Products made sustainably in North America from North American lumber mills and workers, make sure your products are made with Western Red Cedar or other established North American Cedar products.

The Western Red Cedar Advantage

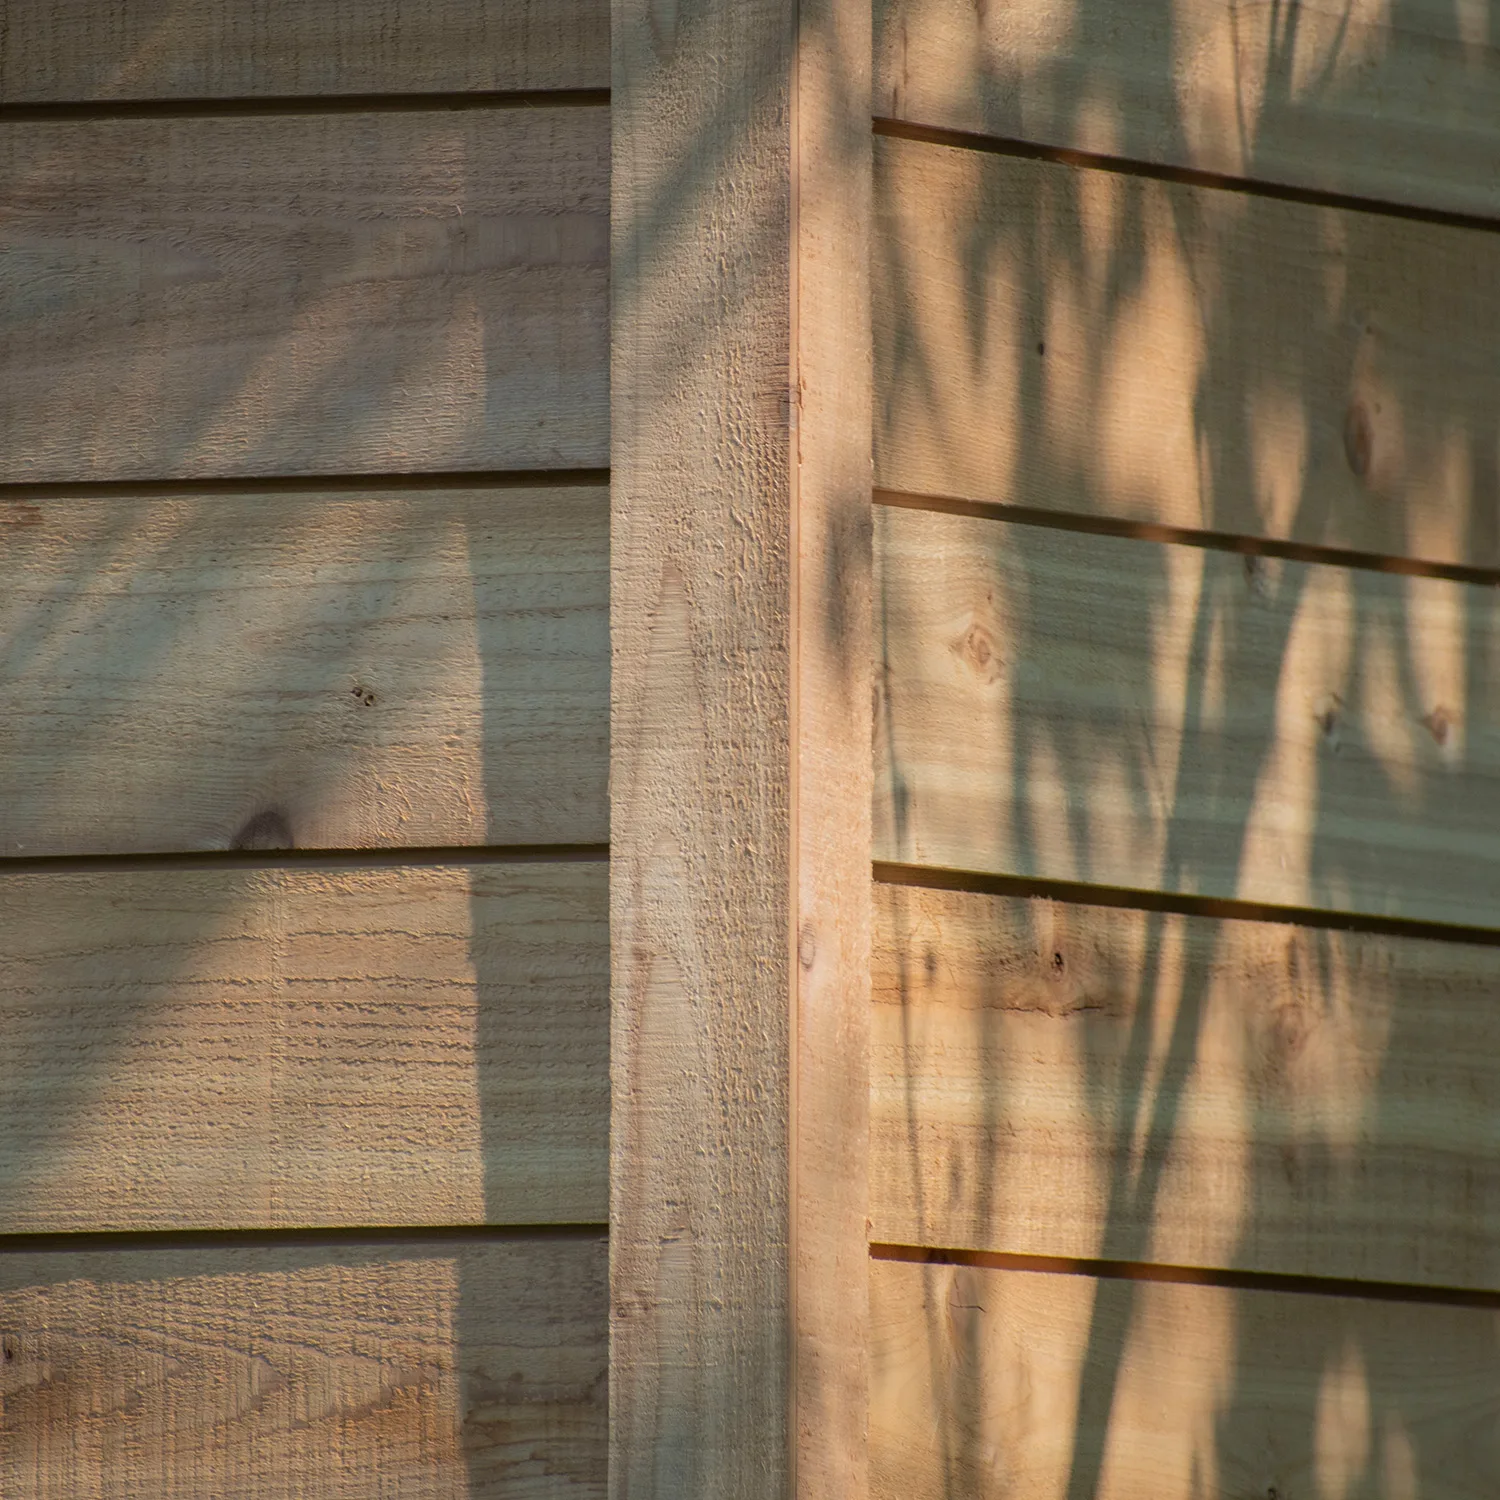
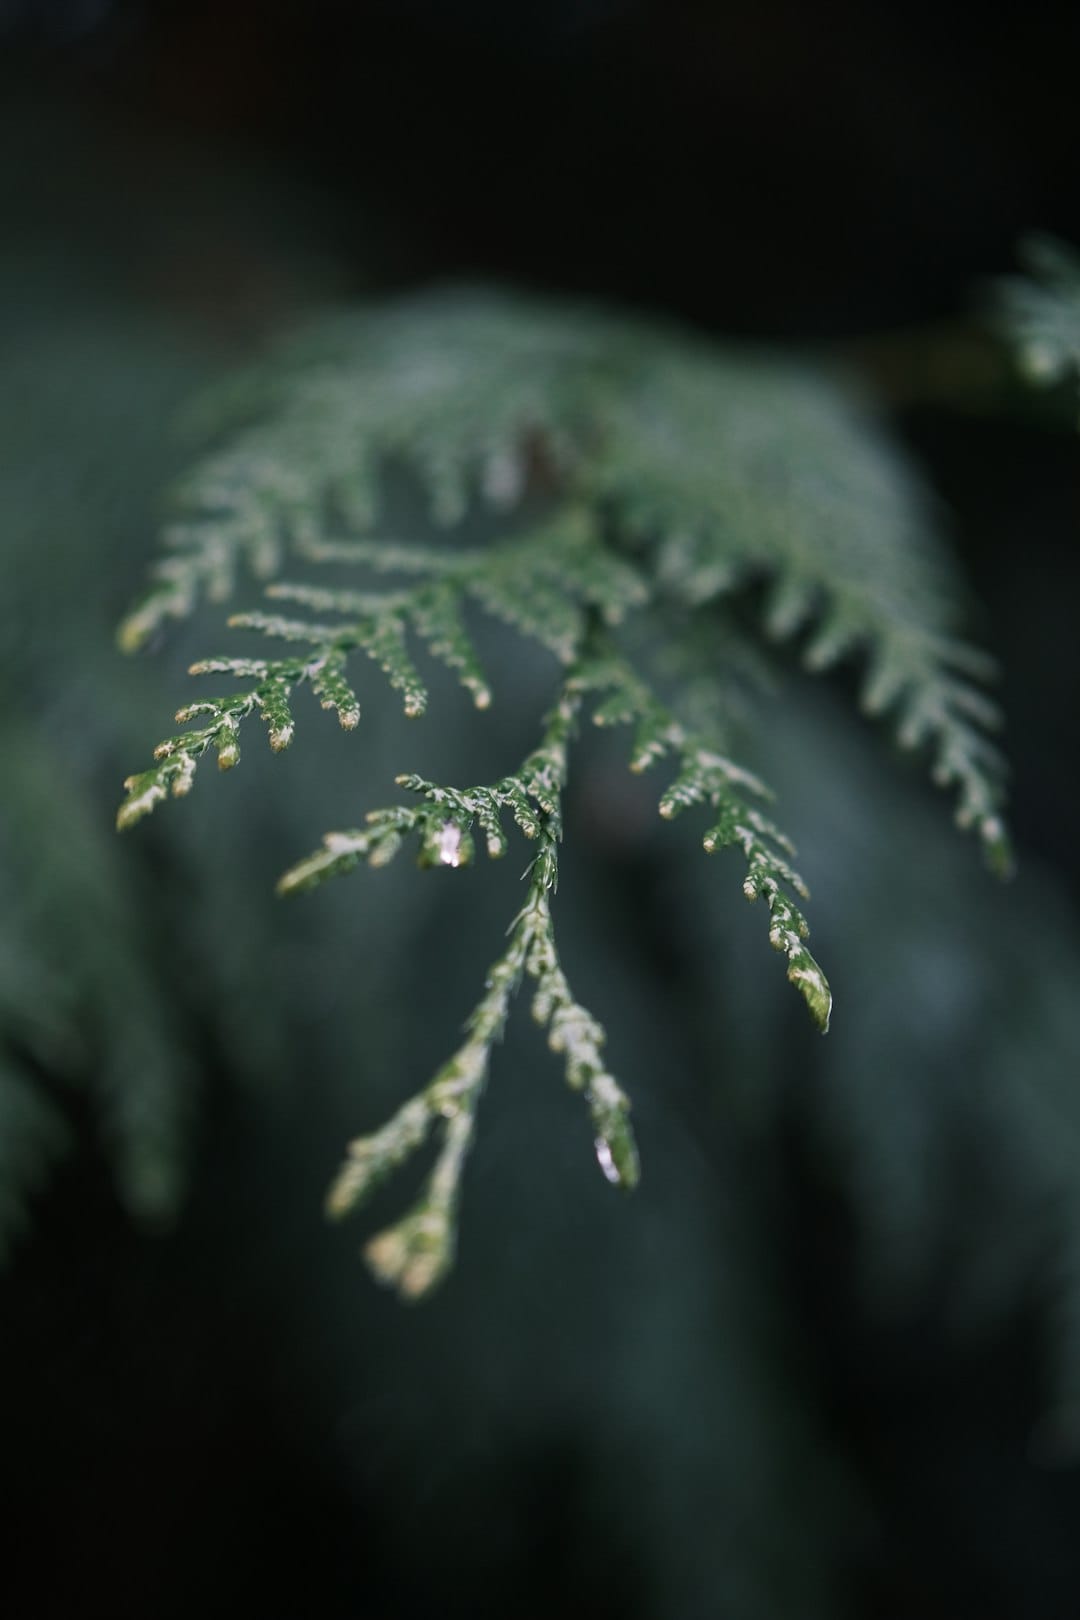
Aesthetically, it is a naturally stunning building material with deep, tonal properties that accentuate the richly textured wood grains and exposed heartwood.

It is both pitch and resin-free, which means that it can hold a variety of finishes from semi-transparent stains to elegant dark stains. It is also incredibly durable and will prove to keep your structure attractive for years to come.

For centuries, the Western Red Cedar has been celebrated by the Pacific Northwest Coast First Nations as the “Tree of Life” using it to build longhouses, canoes, and totem poles. Thousands of years later and the red cedar continues to be a preferred building material.

Red cedar’s reputation for being a naturally durable wood makes it perfect for all outdoor projects. The wood is lightweight and valued for its high natural resistance and decay properties.

It is less susceptible to moisture, insect damage and fungi growth. Cedar is also water damage resistant and can successfully weather long periods of heavy rain and other weather extremes such as snow, hail, and strong winds.

With its unsurpassed natural beauty, centuries of proven performance, low environmental impact, and natural resistance to decay/insects it’s clear to see the advantage of quality Western Red Cedar.

Outdoor Living Today partners with Real Cedar and uses PEFC Certified Lumber 

Feel Free to visit www.realcedar.com to learn more about Certified Western Red Cedar and why it matters. 

Want to learn more about Western Red Cedar?

The Benefits of Western Red Cedar: Why it’s Worth It

Read More

The Benefits of Western Red Cedar: Why it’s Worth It 

When it comes to building materials, it can be tempting to opt for the cheapest option available. However, choosing a more expensive material like Western Red Cedar sourced from Canada and the United States can be a wise investment in the long run.

1. Durability

Western Red Cedar is known for its durability and resistance to rot and decay. This means that it will last much longer than cheaper alternatives like White Cedar or Chinese Fir, which may need to be replaced more frequently due to weathering and other forms of damage. Not only will this save you money on replacements, and repairs, but also reduces the environmental impact of constant resource extraction and processing over time.

2. Premium Appearance 

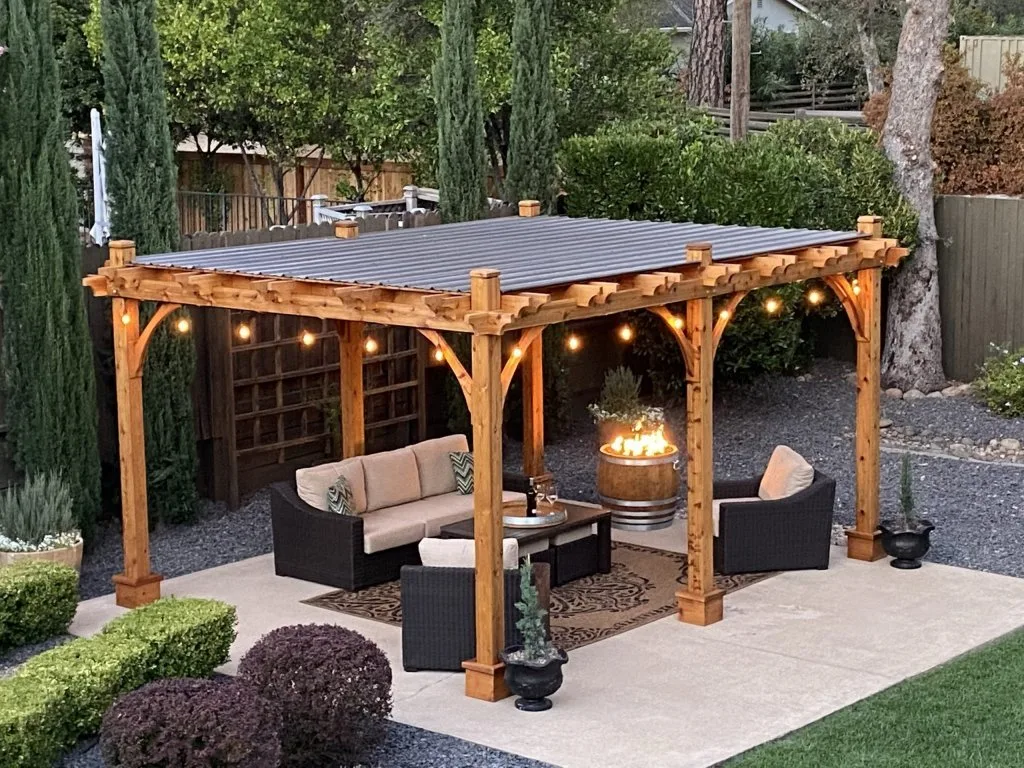
Western Red Cedar has an attractive, natural appearance that adds value and visual appeal to any project. The wood’s distinctive grain and warm color create a timeless aesthetic that cannot be replicated by cheaper alternatives. This makes it a popular choice for outdoor structures like decks, fences, and pergolas, as well as for indoor features like ceilings and accent walls.

3. Sustainability 

Western Red Cedar is a sustainable choice. It is harvested from responsibly managed forests in Canada and the United States, which means that the production process has a lower environmental impact than other materials. This is because the forests are carefully monitored and replanted, ensuring that the ecosystem is protected for future generations.test 2 scaled

4. Economic Impact

 Lastly, let’s discuss the economic impact of your purchasing decision.

By choosing this material, you are supporting the local economies of both the United States and Canada, as well as helping to create and sustain good-paying middle-class jobs within the forestry industry.

In Canada, the forestry sector is a major contributor to the country’s economy, accounting for more than 200,000 jobs and generating billions of dollars in economic activity each year. Similarly, in the United States, the forestry industry supports over 2 million jobs and contributes over $300 billion annually to the country’s economy.

By choosing Western Red Cedar sourced from Canada and the United States, you support the livelihoods of those working in the forestry industry, including loggers, sawmill workers, and others involved in the supply chain.

This benefits individuals and their families and helps boost local economies and creates a ripple effect throughout the broader community.

Overall…

Choosing Western Red Cedar sourced from Canada and the United States is not only a wise investment in terms of durability, aesthetics, and sustainability but also a way to support the economies of both countries and create and sustain jobs within the forestry industry.

morinyanick 4 scaled

Sources:

Read More
Wooden Shed or Plastic Shed The environment should be respected and many people are trying to save/impact it with small steps that, collectively, could impact the atmosphere in a major way. If you are looking to be more eco-friendly, why not include your garden in your plans?Growing your own fruits and vegetables and using rainwater harvesting systems are just a few of the ways you can become more environmentally-friendly.If you are looking for different methods to reduce your carbon footprint, keep in mind that your garden shed can play a huge role. There are quite a few incredible ways to transform your shed into an eco-friendly zone.

Wooden Shed or Plastic Shed?

Sustainable Structure

If you need to replace your old shed with a new structure, make sure that you choose one which is made out of responsibly-sourced material from an ethical manufacturing company.When trying to decide between a wooden shed or plastic shed, wood is your best choice in our opinion. Wood has a negative carbon footprint and acts as a carbon sink which is excellent. This means as a tree grows, it stores carbon in its fiber. When a tree is harvested and cut down and made into a shed or other building product, the carbon stays in the product and does not get released until the life cycle of the product has ended.In comparison, sheds made from plastic, steel and aluminum use a tremendous amount of CO2 in the production process which is released immediately into the atmosphere. This release of carbon during processing increases the global warming crises we are now in.Garden sheds made with plastic are also more difficult and expensive to recycle and use additional CO2 in the recycle process. By using easier to recycle materials such as wood, you lessen your carbon footprint as well.If a wood shed is well-constructed and prepared properly for the elements it can last for a very long time, particularly if made from western red cedar, which is naturally resistant to decay and rot.Other wood species, such as pine, can be chemically treated to extend its life to replicate cedar wood. If you prefer, you can finish your wood shed yourself with special treatments to make it weather and water proof.These treatments will give your outdoor space the look you desire and make sure that extreme weather conditions do not cause any damage and that it will last for years to come.Meanwhile, remember to check the credentials of the company you are planning to buy from, either wood, plastic or metal, to ensure that they are environmentally-conscious and the materials they use are 100% sourced from certified materials, procedures and standards.If you buy a shed from an overseas manufacturer, consider that country’s environmental practices and the materials they are using. Ethical companies in North America, particularly forest companies, will always go through the effort of achieving certified accreditation from such organizations as the Forest Stewardship Council (FSC) or The Program for the Endorsement of Forest Certification (PEFC).Both accreditations are confirmed only through independent third party inspections, ensuring the wood they are harvesting comes only from legally and sustainably managed forests.

A Suitable Investment

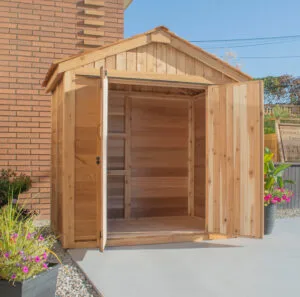
Like pergolas, gazebos, and other outdoor structures,  a wooden shed or plastic shed is an excellent addition to your property. All structures offer you an outdoor space that you can make good use of and also add value to your property.Western red cedar garden sheds are a fantastic option if you are looking for an outdoor structure made with eco-friendly materials. By choosing a shed made of wood, you are making sure that you reduce your carbon footprint and contribute to making the earth a greener and cleaner place.
Read More
For centuries, red cedar has been a preferred building material. In fact, archeologists in British Columbia have found artifacts that point to the use of red cedar wood in native societies from as far back as 8,000 years ago. Every part of the tree was used including the roots and bark for constructing basic objects such as baskets and ropes to the wood for housing and canoes.Today, red cedar still maintains the reputation as being one of the world’s best building materials. It offers unique natural performance characteristics such as being lightweight, stable, durable and resistant to water and insect damage. Aesthetically, it is naturally stunning with its deep tones and textured wood grains.It is also an environmentally friendly choice with its high thermal coefficient and ability to remove greenhouse gases. Plus, it is renewable, biodegradable and sourced from the most sustainable forests in the world.Cedar is a popular design choice for good reason and at OLT, we love being able to share the advantages of Western Red Cedar with our customers.For a quick overview of the history of cedar in design and building, check out the infographic below.infographic_History-of-Using-Cedar-OLTEmbed This Image On Your Site (copy code below):
Read More
How-to-Maintain-a-Deck-or-Pergola A deck or a pergola can add a wonderful rustic charm to any home and enhance the appearance of patios and walkways. But the problem starts when your deck begins to be exposed to the elements. A weathered deck or pergola tends to look faded, the grain appears washed out and the timber starts to look old.Maintaining your cedar deck or pergola will help keep these elemental issues at bay and boost the natural appeal of your garden. Here are some ways you can maintain your deck or pergola:

Cleaning your deck and pergola

If you are planning to restain your deck or pergola or are simply interested in keeping it free from dirt, mildew or grime, it is important that you clean it regularly. To clean your deck, use household substances that contain Napisan. Add 2 cups to half a bucket of hot water to create a super solution to clean your pergola with. Scrub your deck down with a stiff bristled decking brush when you apply the cleaning solution.Leave the solution on for about 15 minutes, add some more, and scrub it well. Then rinse the solution off and allow it to dry. You may need to resort to using a commercial stain stripper if there is buildup of stains on your deck, which will help to get rid of any surface staining. Exert caution while using stain stripper since it is caustic and may harm pets or plants.For a cedar pergola, try to avoid harsh abrasives and cleaning detergents, which may end up damaging and discoloring it and weakening the composition of the wood. Instead, use water, a mild detergent and a soft bristle brush to clean it well. If you don’t have time, you could even get away with hosing your pergola down once every 2 to 3 weeks. Remember to use a medium pressure setting on your garden hose since high pressures may damage the surface.

Getting rid of stains and mildew

Mildew can ruin a pergola or deck quite fast. As soon as you spot mildew building up on your outdoor surface, you must work fast to get rid of it quickly. Sometimes, the corrosive fasteners used on your deck may cause brown or black stains over time on the wood.After you have washed your pergola or deck, mix a cup of oxygen bleach with a gallon of water in a spray bottle and spray the solution onto your deck after you have thoroughly washed it. Once you see the mildew and stain start to fade, use soapy water to wash the solution off and rinse it well.

Staining your deck or pergola

Sometimes, the color of your pergola or deck may fade over time. If you look at a cedar pergola for example, it may turn silvery-gray from its light reddish color. This is mainly due to the natural weathering process of the wood. You could consider applying a stain and sealant to preserve the original color.Before you apply the stain to your deck or pergola, spray some wood brightener on it to make the wood more receptive to the next coating of stain and to neutralize any residual stain stripper. Spray this on, allow it to rest for a few minutes and then rinse it off.To stain your deck or pergola, you can use a paintbrush, the bristles of which are useful in opening the pores of the timber, allowing it to absorb the stain much more efficiently. Avoid applying too much stain to your pergola or deck, which could make the surface peel and crack, and look unappealing. Use long, continuous strokes on a single board at a time without touching any of the other boards.Be sure to coat each board evenly. Move on to the next row when you have finished one. Refer to the directions on the can for the drying time and when it is safe for you to apply the next coat of stain. In the second coat, you will need to use less oil than the first, as the wood will not be able to absorb much at this time.For cedar pergolas, there are also many special semi-transparent oil-based wood stains available, which you may simply spray on your deck. If you are applying a sealant, do so only after the stain has been allowed to dry well. This may be reapplied every 3 to 4 years

Repairing your deck or pergola

Keep an eye out for any corrosive fasteners that may be causing stains. It is wise to simply replace them. In the case of a cedar pergola or deck, flip the switch for materials such as stainless steel or aluminum, which does not react with the wood, and reduces the maintenance work that goes along with it.
Read More

How to Organize Your Garden Shed Like a Pro

gc42 7

An organized garden shed saves you time, energy, and money. When everything is in its place, you’ll no longer waste time searching for your trowel or spend extra cash replacing items you can’t find. A well-structured tool shed can also reduce stress and improve safety.

Hose Storage Made Safe

Avoid tripping hazards by mounting your garden hose on a sturdy wall hook with a steep angle. This not only keeps your space tidy but prevents painful falls.

Hang Long-Handled Tools

Space Master 12x16 SM1216 Outdoor Living Today western red cedar Banner 2

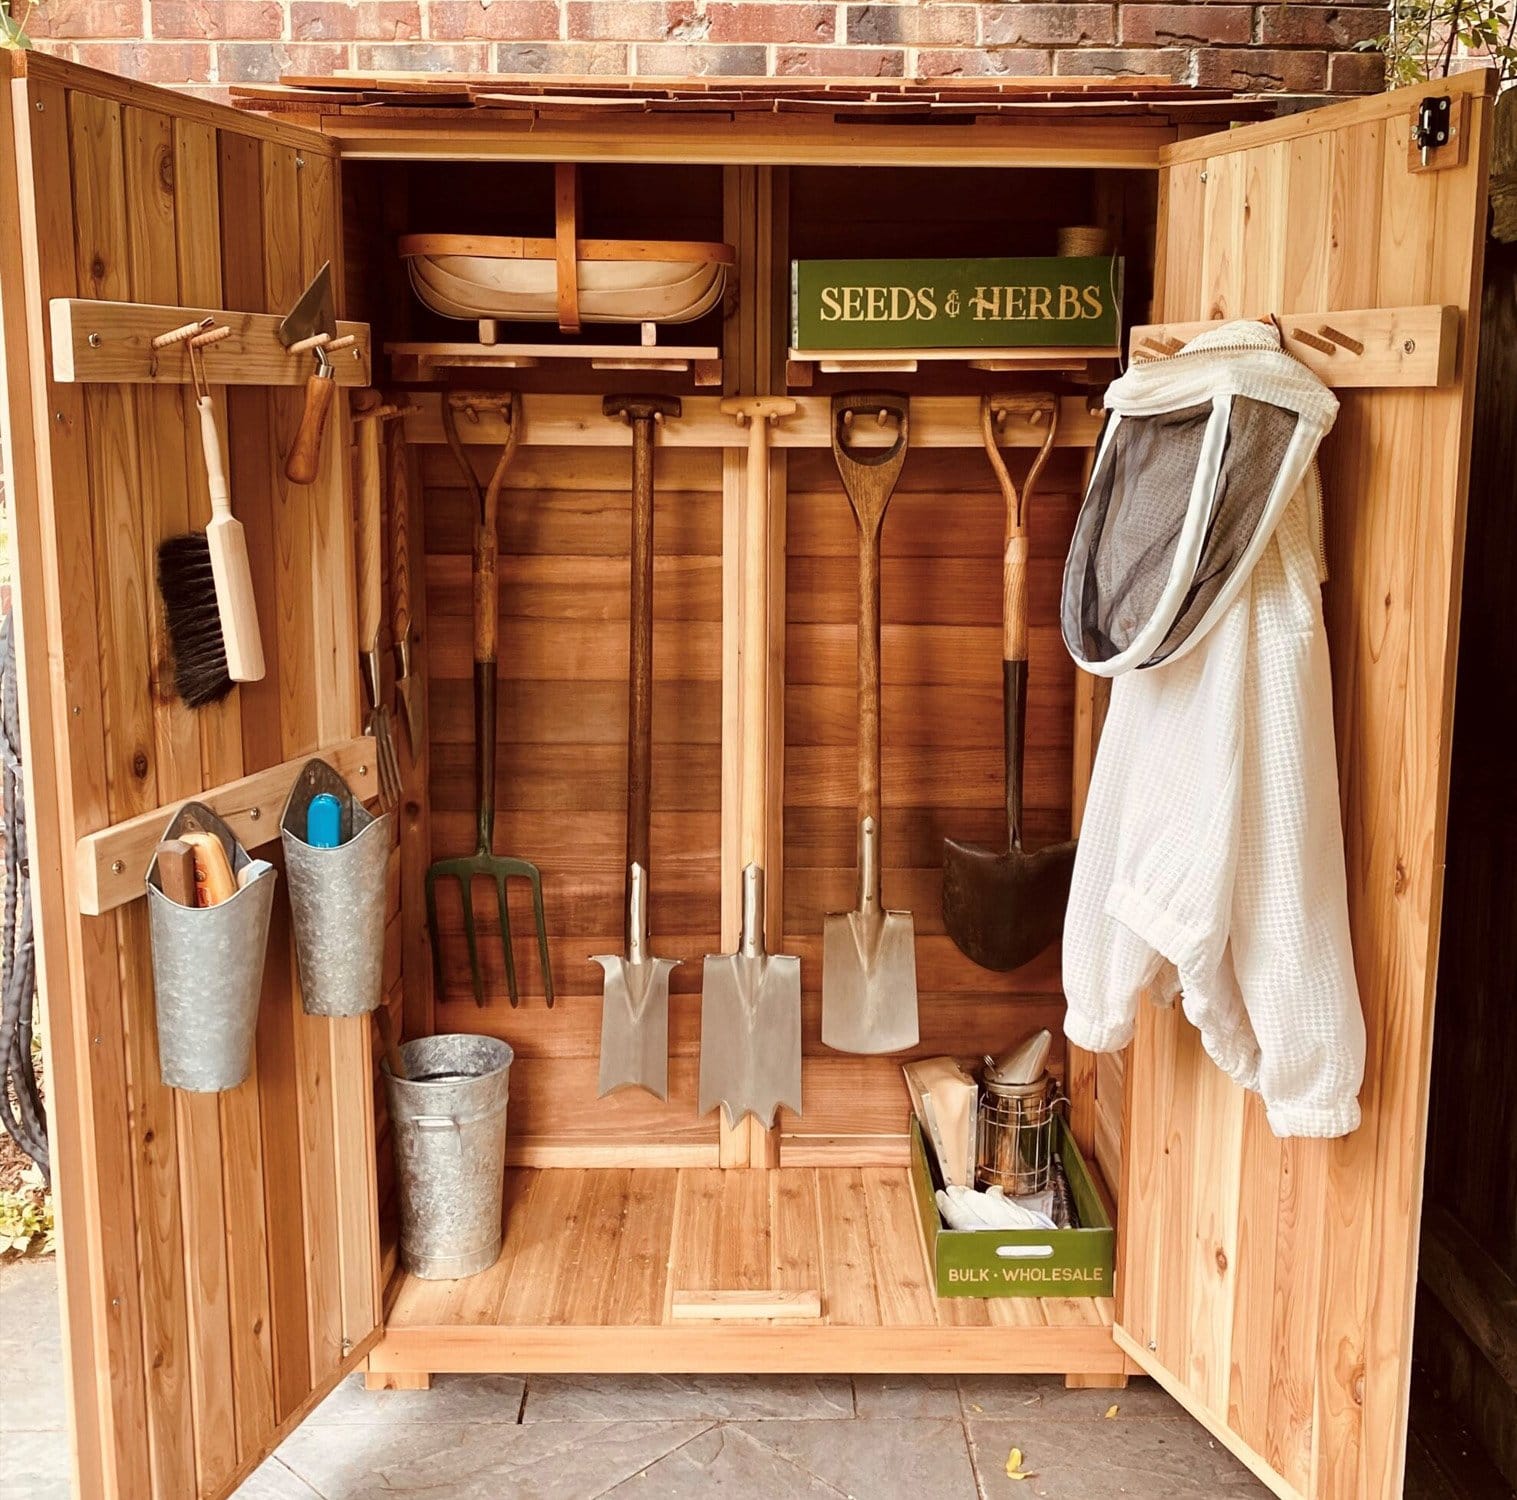
Maximize floor space by installing a tool hanger on the inside of your shed door. Long-handled tools like rakes and shovels stay out of the way but within reach.

Install Open Shelving

Open metal shelves are ideal for tight sheds with limited natural light. They allow sunlight to pass through and make your tools easier to spot. Choose adjustable shelving to fit your tools of all sizes.

Use Bins to Avoid Clutter

Shelves alone won’t prevent chaos. Use plastic or metal storage bins to group and organize smaller items neatly.

Add a Magnetic Tool Strip

Mount a magnetic strip to store metal tools like pruning shears or trowels. Mechanics have used this method for years—apply the same logic to your garden shed for quick access and safe storage.

Create a Potting Bench

pb42 2 1

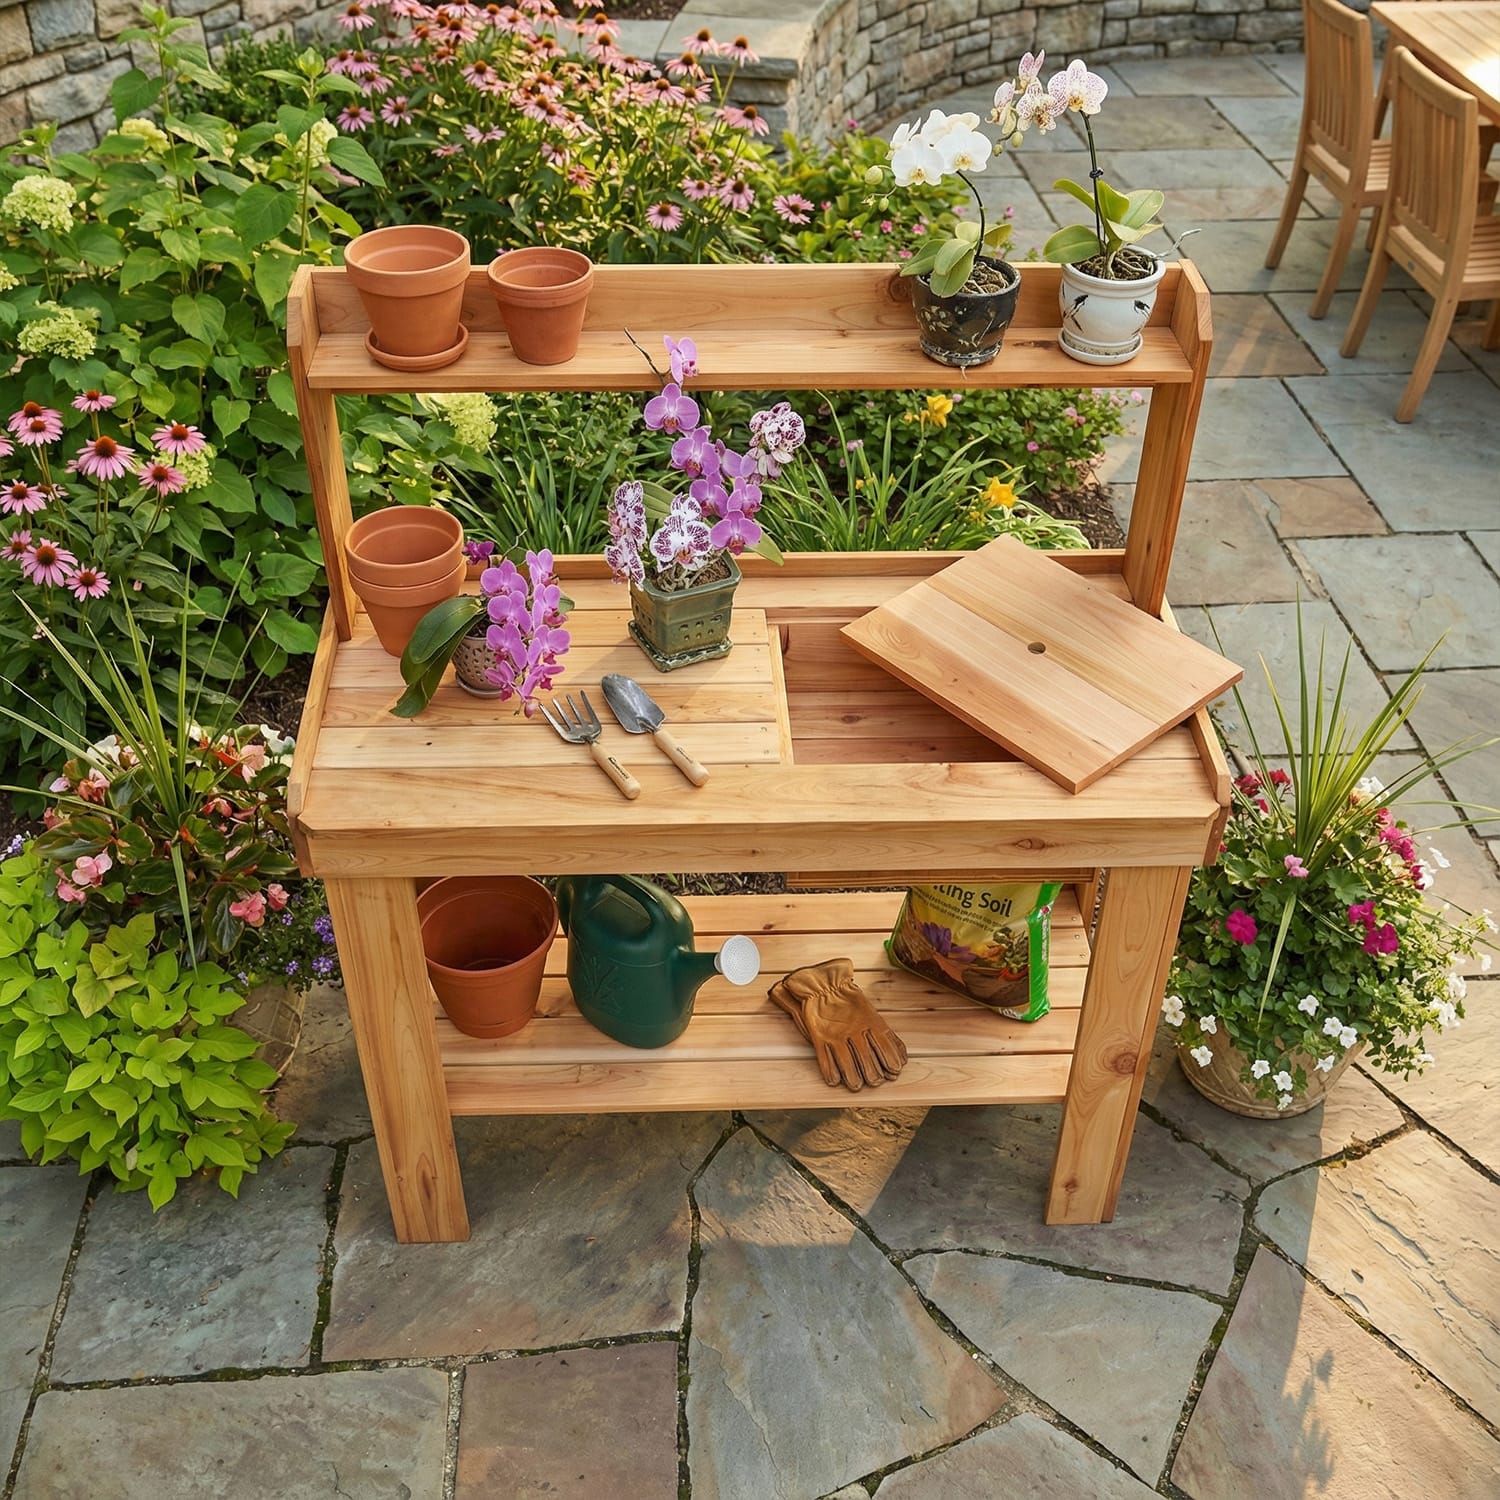
A potting bench gives you a dedicated space to plant or repot—even on rainy days. It also keeps potting mix dry and your gardening more enjoyable.

Track Tasks with a Calendar

Install a metal calendar in your shed to track seasonal chores. Bonus: magnetic holders let you store seed packets, plant tags, and more in one place.

Wicker Basket Essentials

Hang a wicker basket on your shed door to stash essentials like gloves, shears, or gardening books. It’s the quickest grab-and-go storage for your most-used items.

Baskets Under the Bench

Place a bushel basket or bin under your potting bench to hold mulch, birdseed, or potting soil. You’ll find great deals at local flea markets or use any weatherproof container you have.

Add a Portable Ramp

RAMP Option OLT

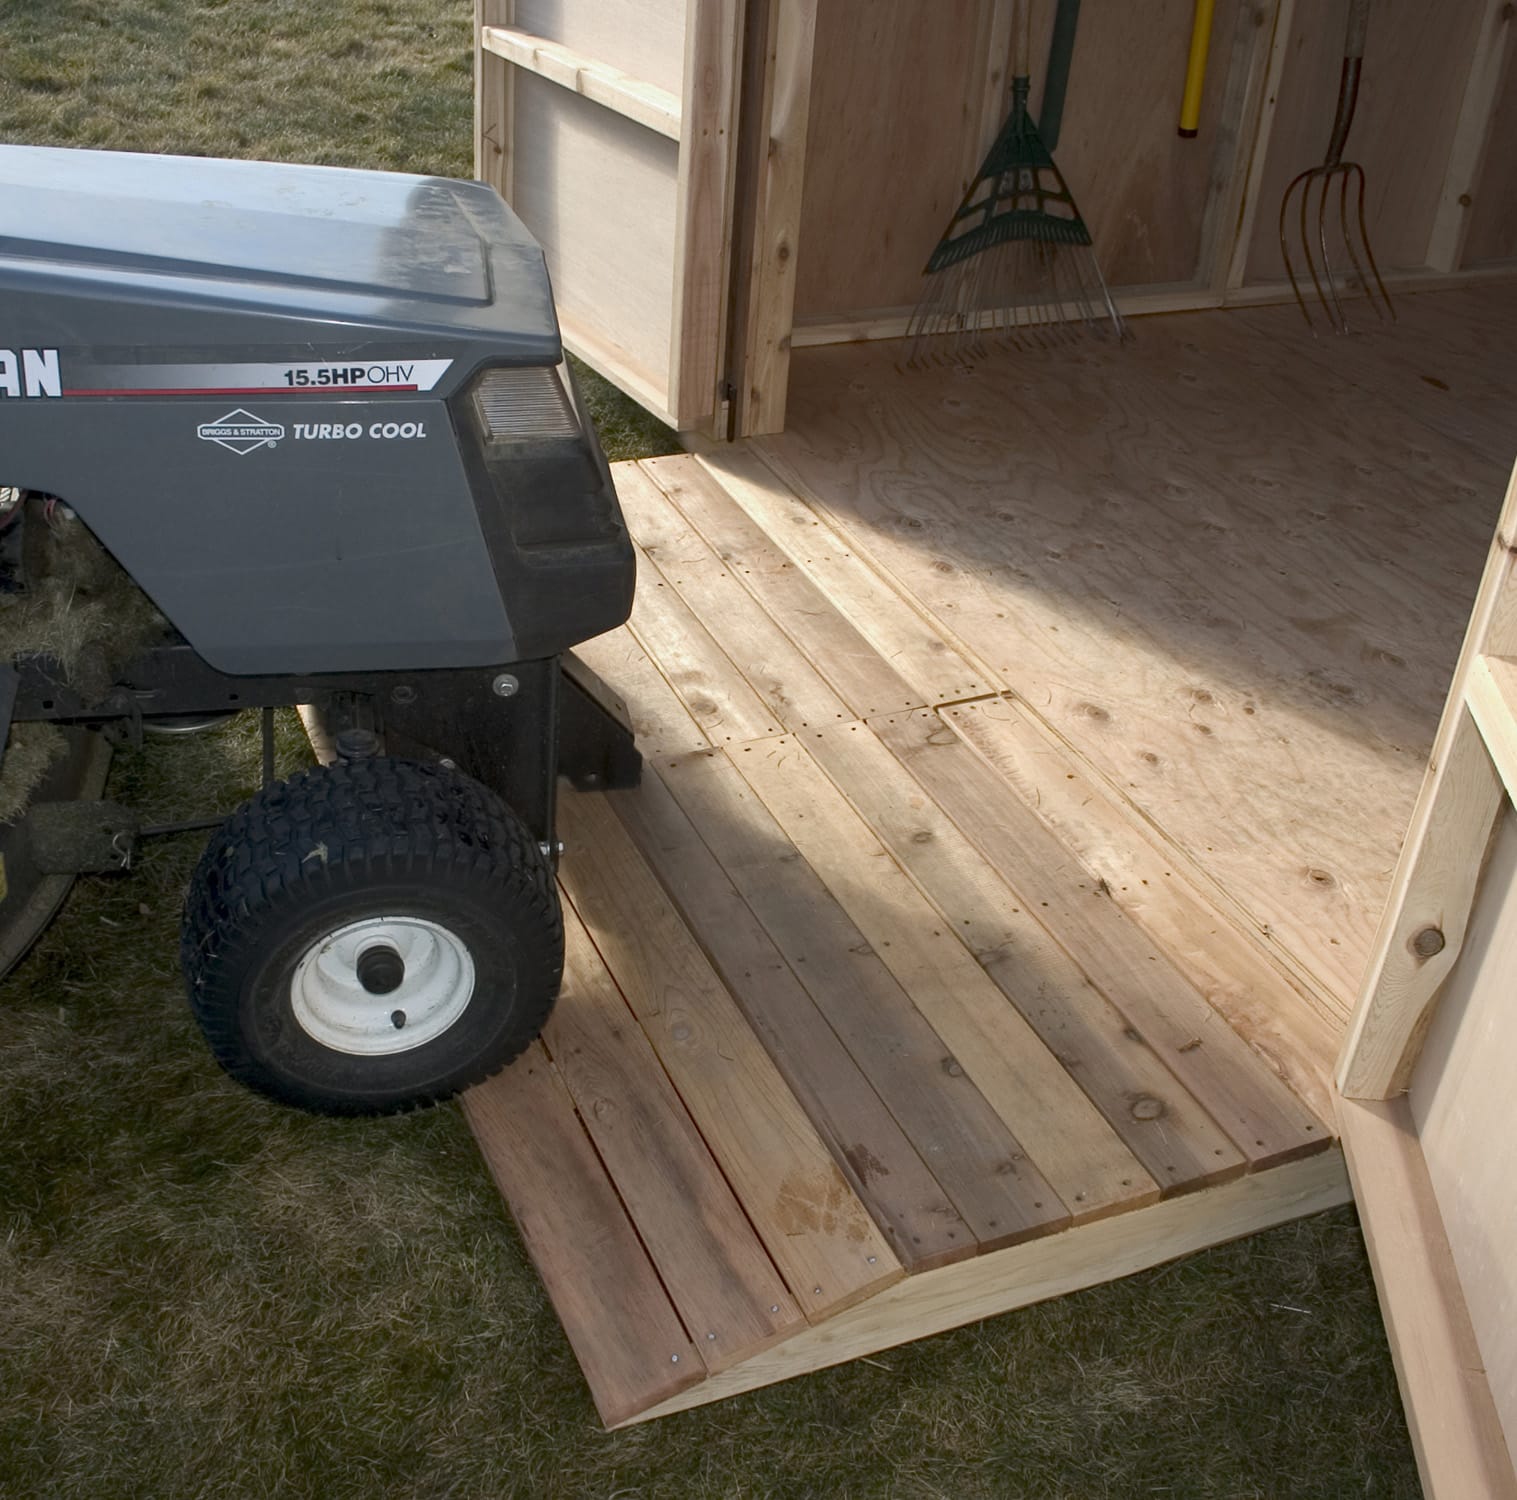
Make moving heavy equipment easier with a DIY ramp. A couple of 2x4s and a piece of ½” plywood can create a sturdy yet compact ramp that’s easy to store when not in use.

Plan Shed Design Around Your Needs

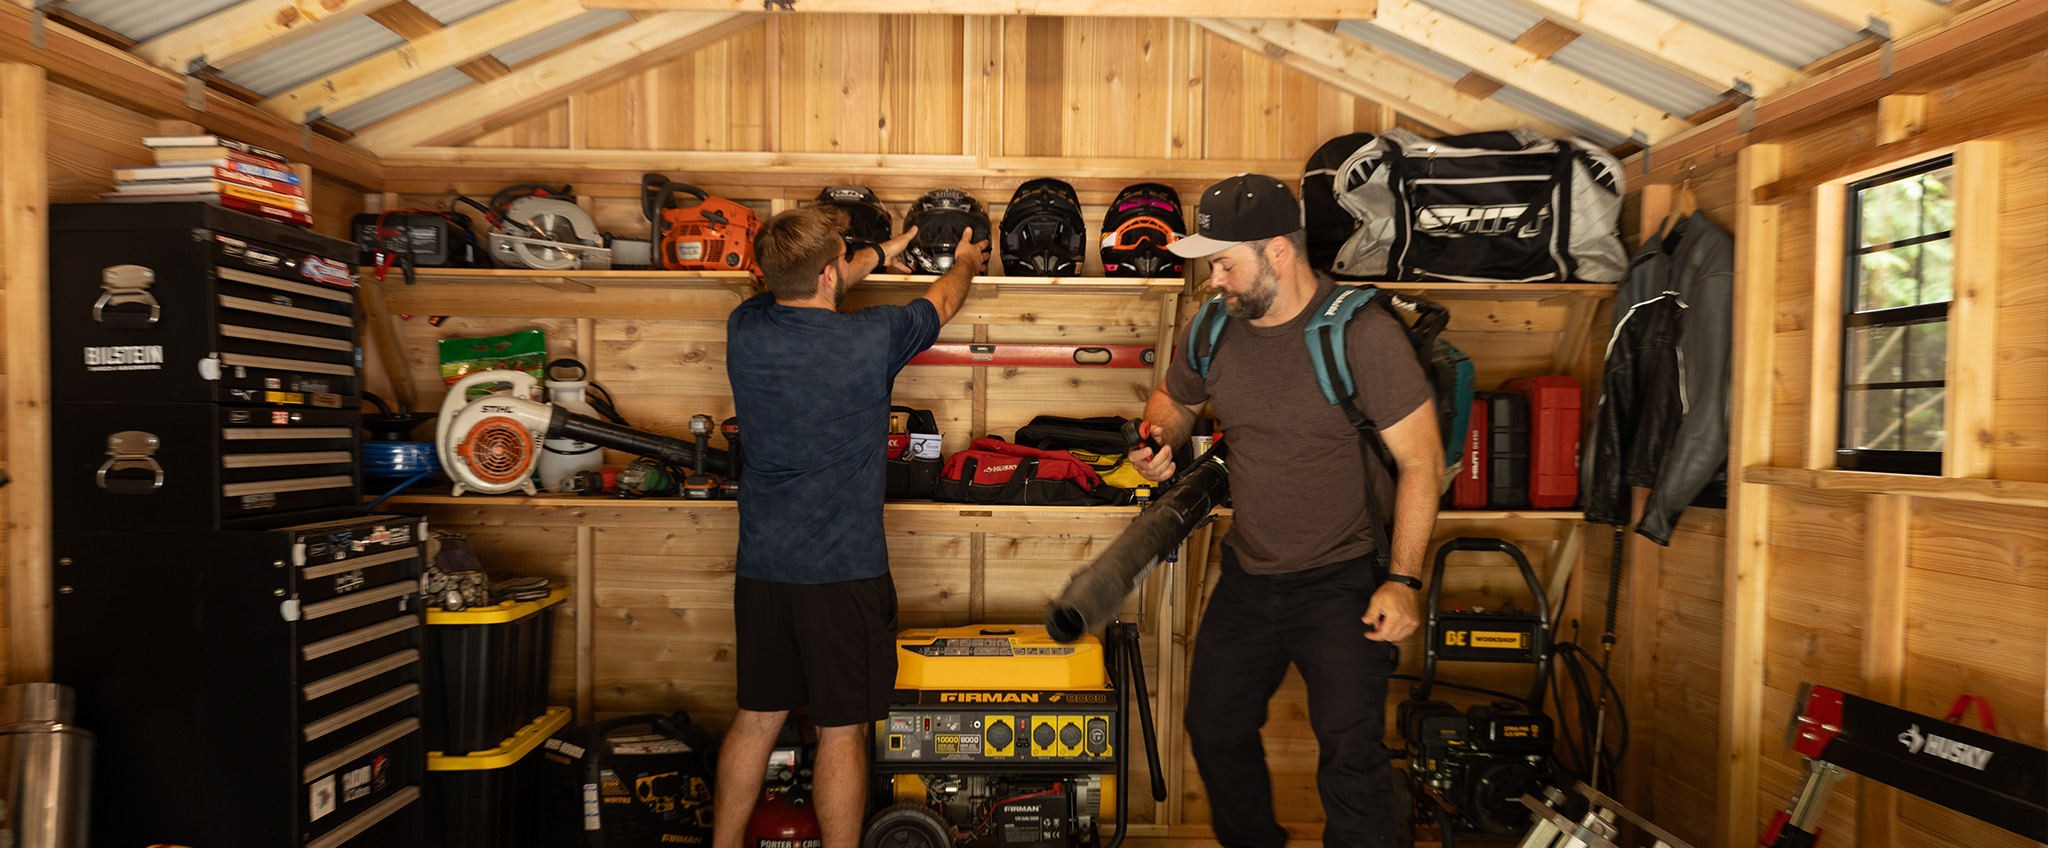
Before building or buying a shed, pile up your gear and measure its footprint. If you plan to store large power tools, you’ll need more space—plan accordingly.

Prioritize Tool Placement

Keep frequently used tools at the front and center of your shed. Store less-used items at the back. Make sure trowels, gloves, and pruning gear are always easily accessible.

Hang Tools Safely

Mount smaller tools like rakes, saws, and cultivators on the lower section of your shed wall or doors. This keeps blades safe and tools in good condition while protecting you from injuries.

Declutter Ruthlessly

Group similar items—cords, seeds, chemicals—and donate or dispose of broken, rusty, or unnecessary duplicates. An organized shed starts with only what you truly need.

Read More

How to Build a Level Base for Your Shed: Step-by-Step Guide

OLT How To Build A Foundation Graphic Steps 2

If you’re building a garden or storage shed, the single most important step is preparing a solid, level base. Even if your yard looks flat, assuming it’s level can lead to major headaches down the road. From wobbly workbenches to crooked walls, an uneven foundation impacts everything that comes after.

In this guide, we’ll walk you through how to create a strong shed foundation using crushed stone and pressure-treated wood.

Why Leveling Matters


A level base ensures your shed walls, doors, and especially roof panels align properly during assembly. Many DIYers discover too late that an off-kilter base causes misaligned screw holes, unstable framing, and frustrating gaps during roof installation.

And beyond aesthetics, if you plan to install a workbench, shelving, or any equipment, you’ll need it sitting perfectly level—not tilted like a funhouse.

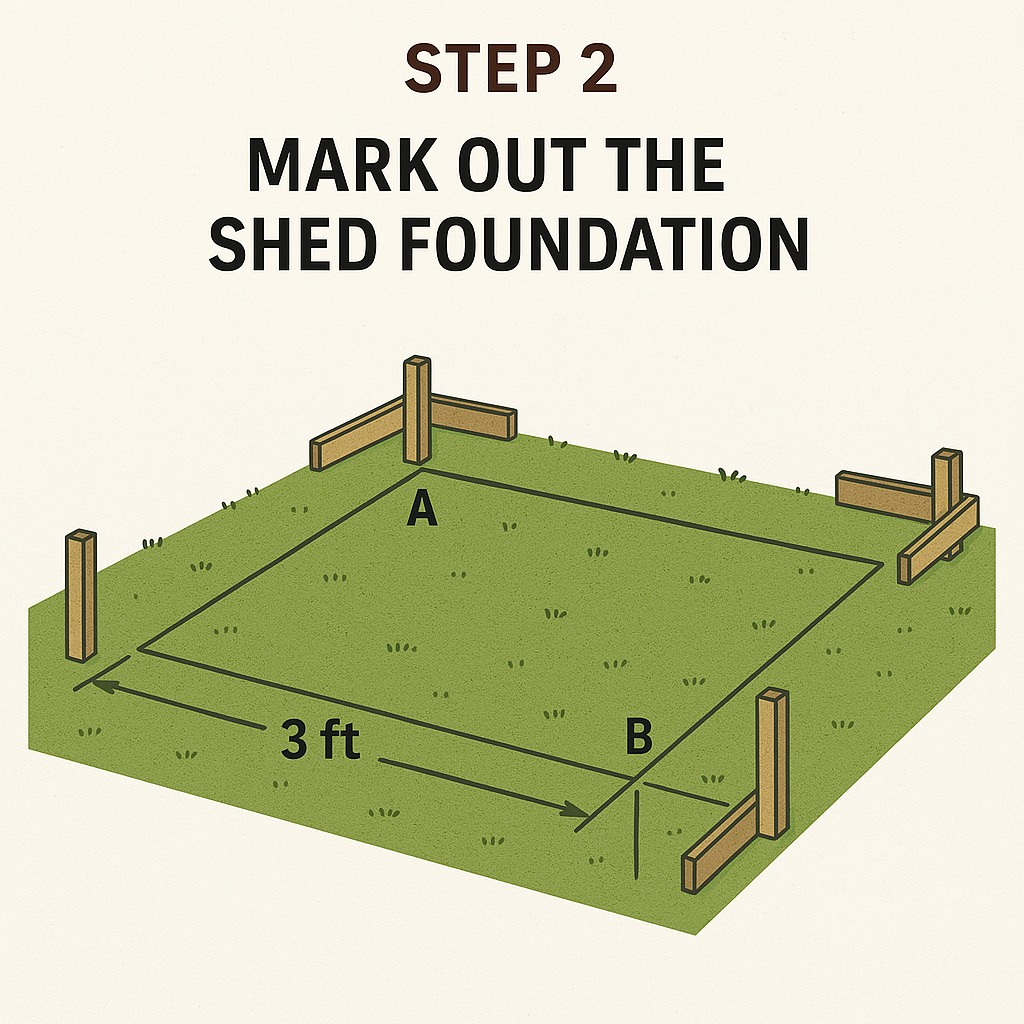
Step 1: Mark and Measure Your Shed Footprint

OLT How To Build A Foundation Graphic Steps 8

Start by choosing your shed’s final position. Consider:

  • Sun exposure

  • Drainage

  • Obstruction of views or light

Use four wooden stakes to mark out a slightly larger footprint than the shed base. This ensures enough room for installation and airflow.

Step 2: Identify Your High Corner

Use a long 2×4 and spirit level to determine which corner of your base is the highest point. Tap the stake in until it’s 4-6” above ground. This will be your reference height for the other corners.

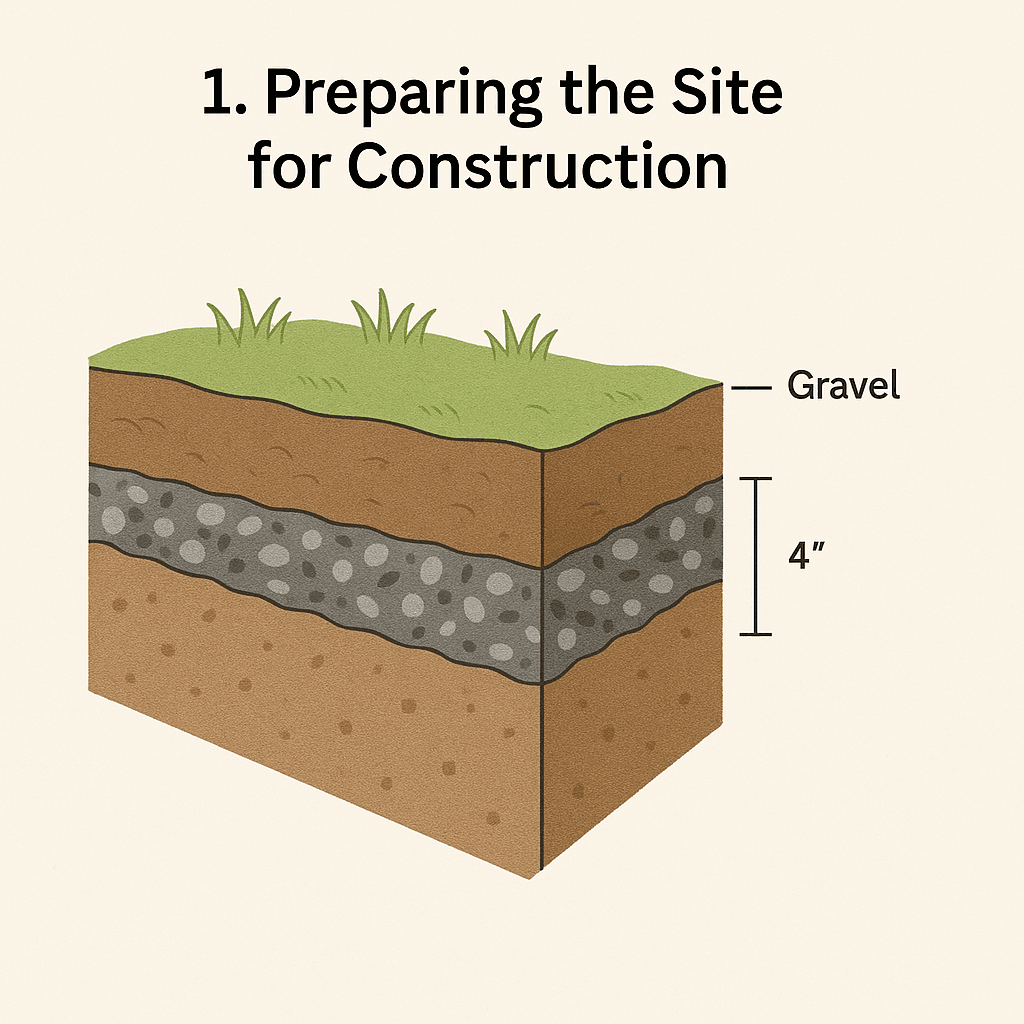
Measure down from this point to determine how much soil needs to be excavated from the remaining corners to make the base level. Strip turf and excavate to 3″ depth minimum (ideally 3″ to 5″).

Step 3: Add and Compact Crushed Stone

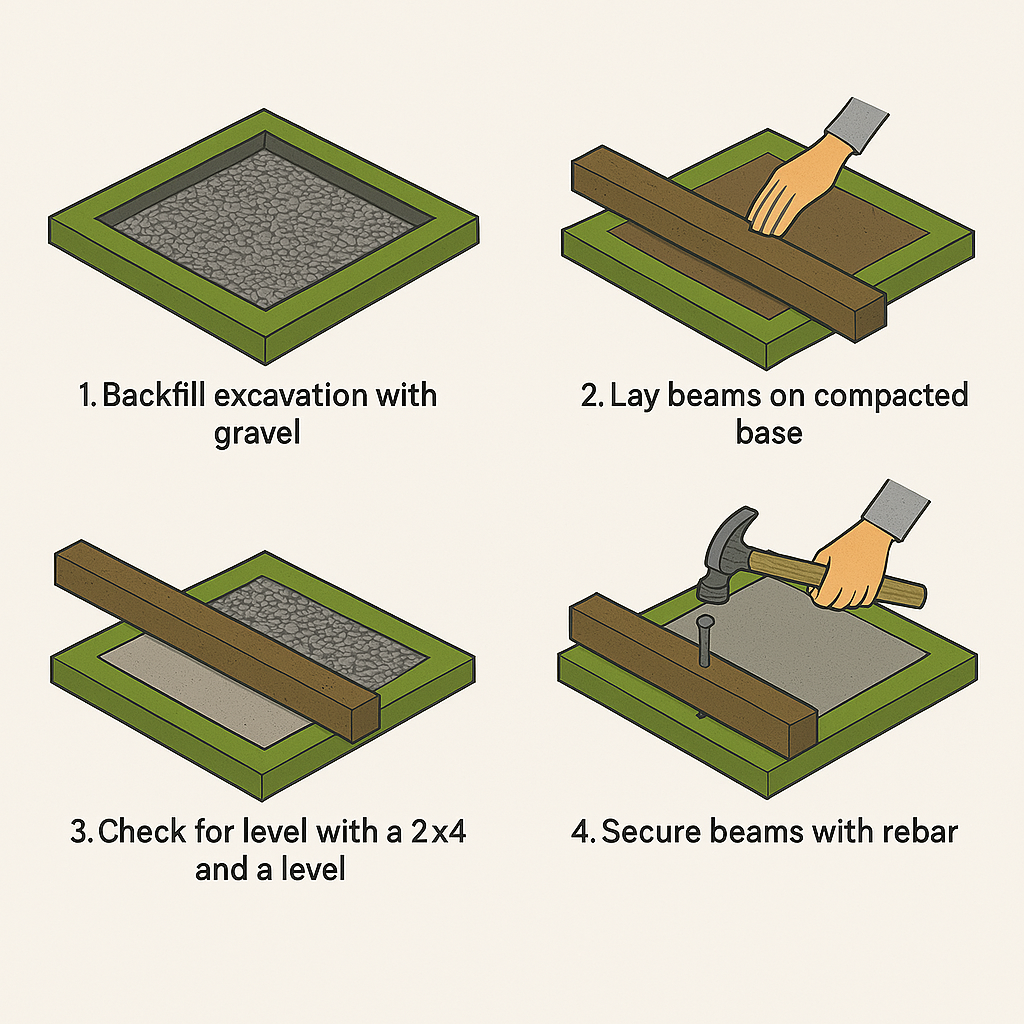
Lay down a weed barrier, then spread crushed aggregate (crushed stone with fine dust). Rake it as level as possible.

To compact it:

  • Rent a vibrating plate compactor or

  • Use a 25 lb hand tamper to pound the stone flat

Keep checking your levels between corners using your 2×4 and spirit level. Add or remove stone as needed until the entire base is flat and compact.

Step 4: Add Pressure-Treated Wood Timbers

OLT How To Build A Foundation Graphic Steps 8 1

Lay 4×4 pressure-treated timbers perpendicular to your planned shed floor joists. These elevate the shed for better air circulation and help prevent water damage. Ensure the wood sits flush and level across the stone base.

Tip: Use stainless steel or aluminum fasteners to prevent staining or corrosion.

Step 5: Maintain Dryness for Longevity

Moisture is the main cause of wood decay. Crushed stone allows water to drain, and elevating your shed with pressure-treated wood adds another layer of protection. Together, they dramatically extend the life of your shed.

Summary

Building a proper shed foundation takes time, but it prevents costly errors and repairs later. A few key tools and steps ensure a long-lasting, stable base:

  • Mark your site carefully

  • Level it out thoroughly

  • Compact crushed stone

  • Add pressure-treated support timbers

With these steps, you’ll have a rock-solid base for whatever you build on top—from garden sheds to backyard studios.


Read More

12 Affordable Ways to Personalize Your Pergola or Gazebo

B. Baker 10x16 Cedar Pergola Kit 2 scaled 1

When it comes to building a pergola or gazebo, there’s a wide range of options to suit any style and budget — from classic Western Red Cedar pergolas to sleek vinyl and metal structures. Whether you’re looking for added comfort, shade, or visual appeal, there are countless cost-effective ways to personalize your pergola or gazebo and make it a centerpiece of your outdoor space.

1. Add Some Furniture

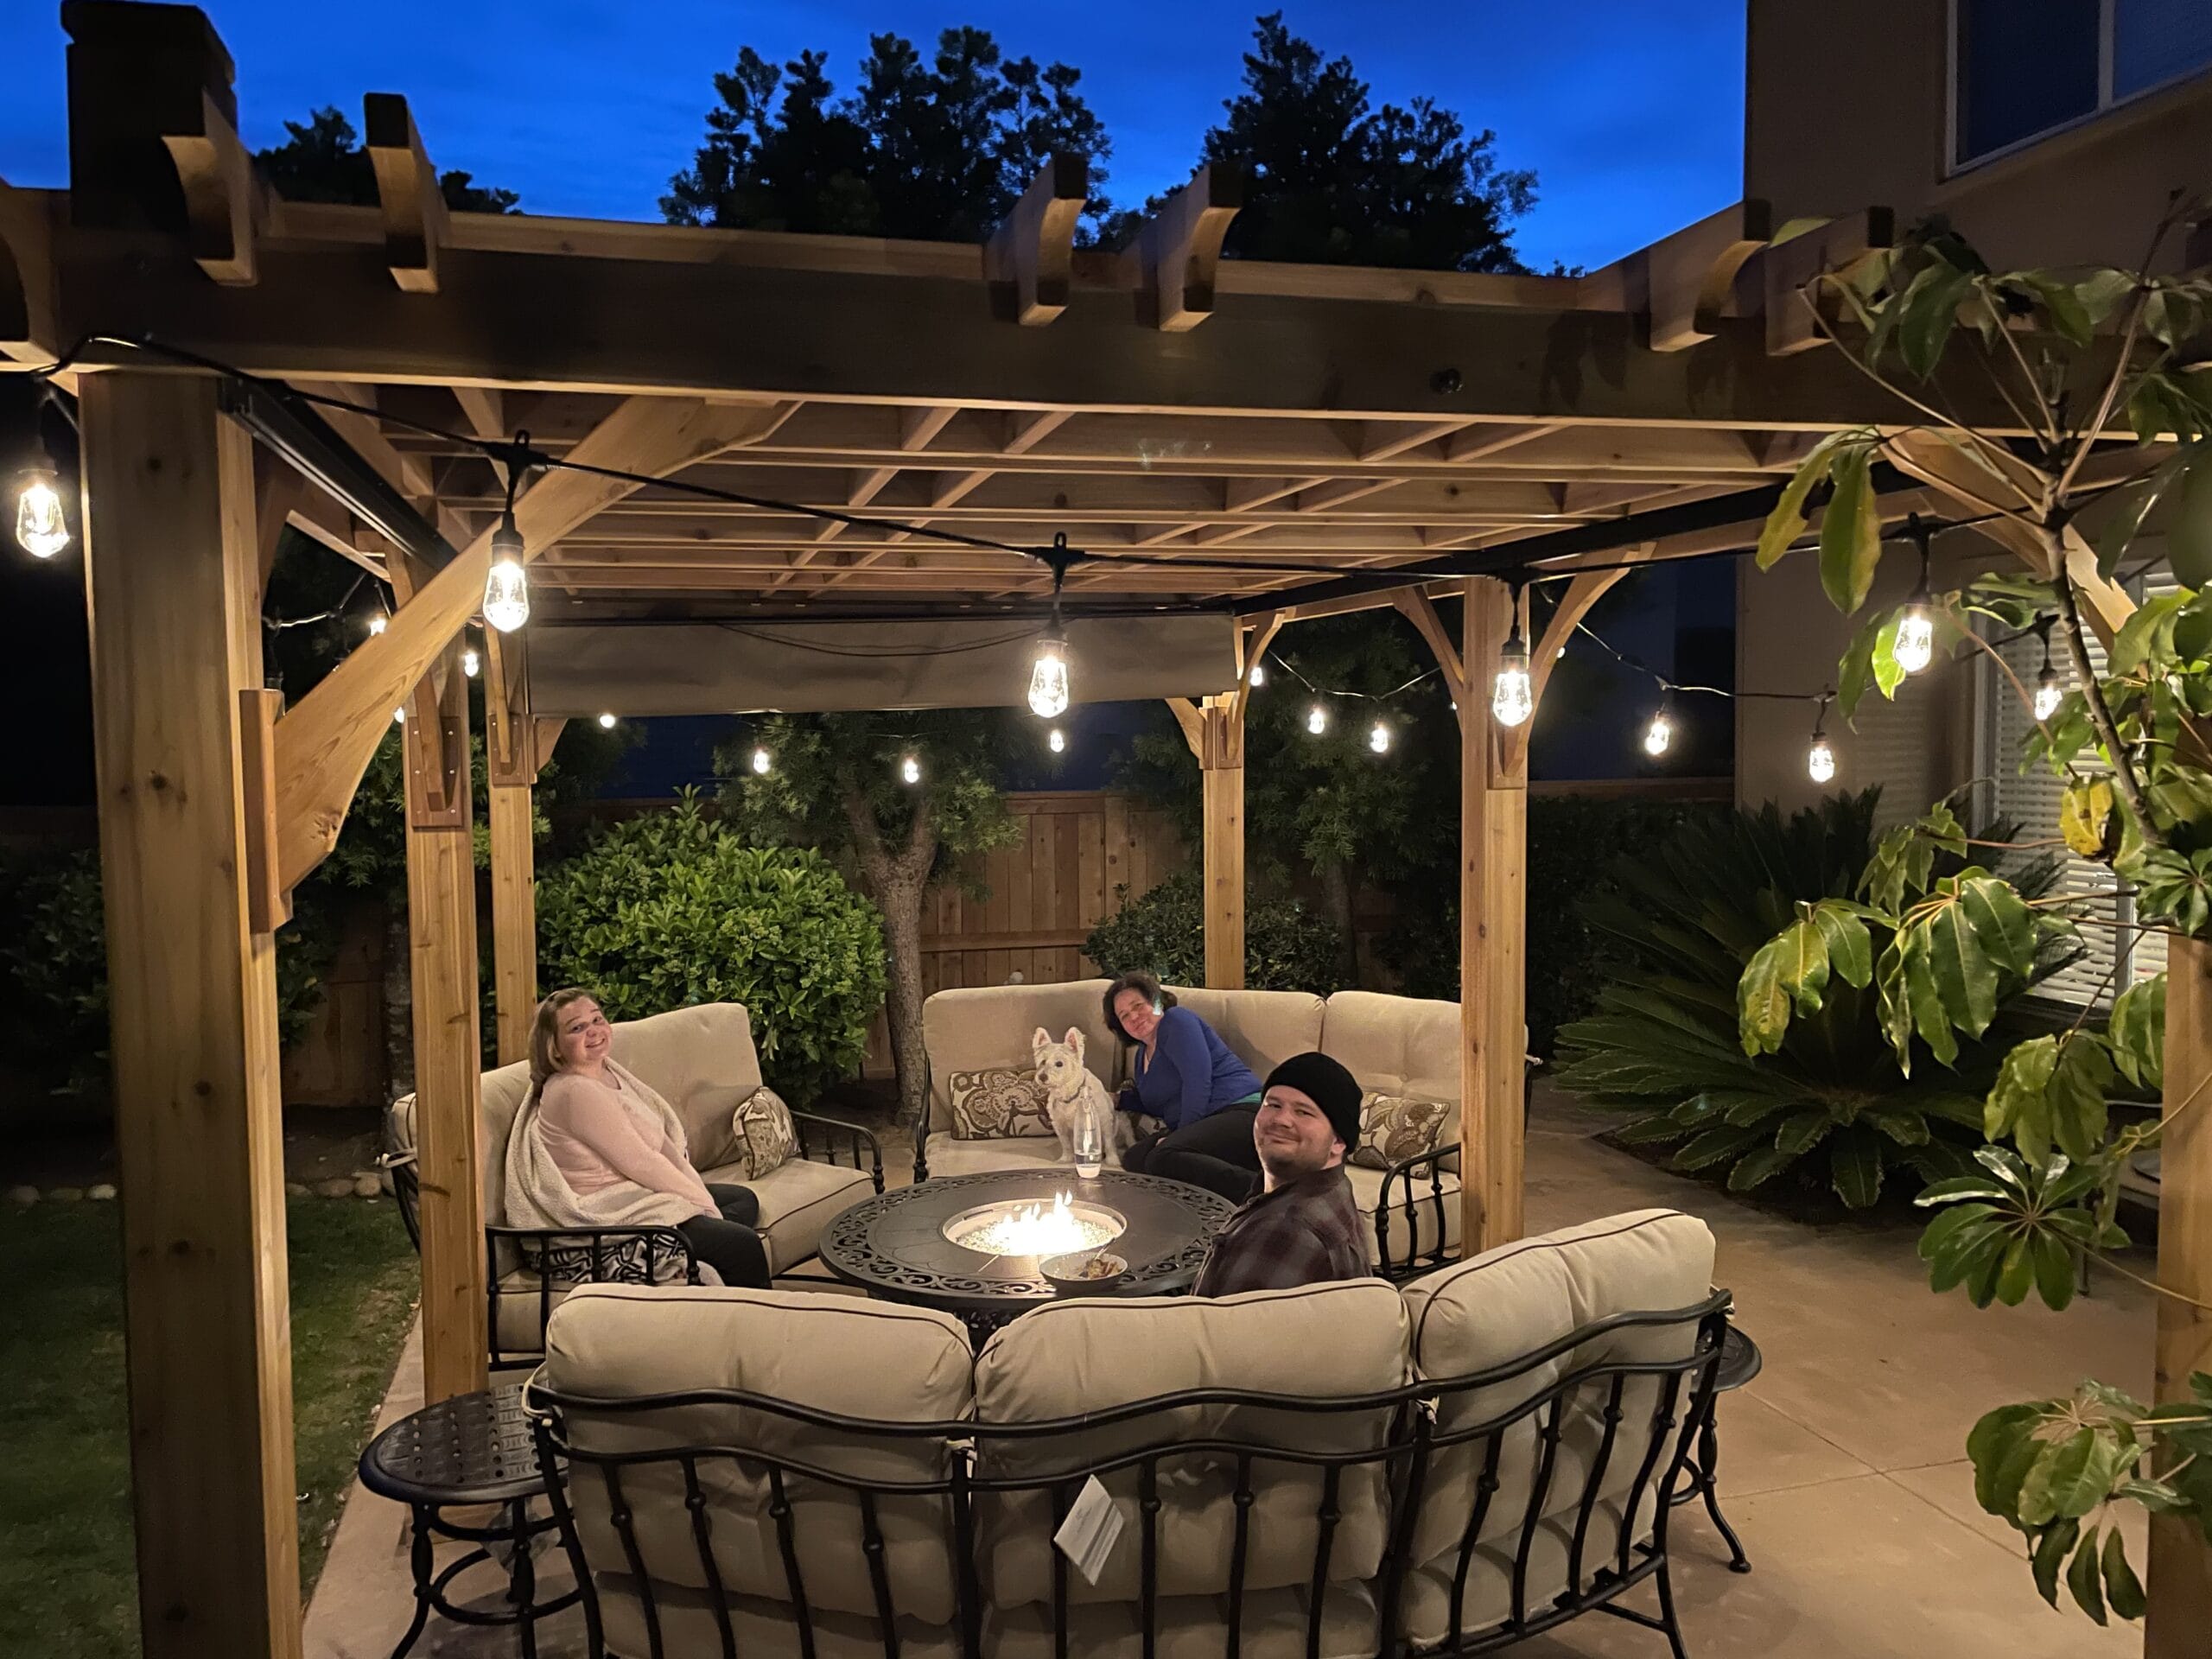
Turn your pergola-covered space into a cozy seating area with a patio table, chairs, or even a hammock. Painting the furniture to match the tone of your pergola adds a thoughtful touch, while placing a hot tub underneath can transform it into the ultimate relaxation zone.

2. Add Extra Rafters or Joists

Most pergola kits come with essential rafters or joists, offering partial shade. But if you want more coverage or support for hanging baskets or climbing plants, consider adding extra joist beams. This customization adds functionality and visual interest.

3. Erect Trellis or Lattice

Trellis or lattice panels can be installed on one or more sides to create a “garden room” feel. Ideal for climbing plants like roses, clematis, or honeysuckle, lattice also provides privacy and shade. Be sure to use durable 1/2- to 1-inch thick wood, and pre-drill holes to avoid splitting.

4. Close One End for Added Privacy

While pergolas are often open-air structures, adding a lattice wall or solid panel to one or two sides offers both privacy and a decorative touch. It softens the lines of the structure and enhances its room-like feel.

5. Include Colorful Flowers

Introduce vibrancy with flowering plants like sweet alyssum, marguerite daisies, or spider flowers. Whether they climb up a lattice or sit in pots around the base, flowers bring warmth and seasonal beauty to your pergola.

OLT 68378af1 a62e 40fb a60b a2418e53ebe2

6. Opt for All-Season Use

Protect your pergola with a solid polycarbonate roof or retractable canopy. These additions allow you to enjoy your outdoor space through rain, snow, or scorching sun — extending usability year-round.

7. Swing Seating Pergolas

Add a built-in swing beneath your pergola for a fun and relaxing touch. Perfect for two people, swing seating makes the space more dynamic and provides a great spot to unwind.

8. Hanging Seats from the Rafters

Replace standard seating with hanging cushioned chairs to create a laid-back, breezy vibe. Hanging seats add movement and charm, making the pergola feel more like a retreat.gaz screen 1024x1013 1

9. Match Pergola to Your Deck

Stain your pergola to match the deck it stands on to create a cohesive look. Add potted plants and soft seating for a secluded, calming vibe that feels like a natural extension of your home.

10. Paint for a Bright Finish

Choose a classic white or go bold with color. Painting your pergola can give it a refreshed look that aligns with your backyard’s style. For cedar pergolas, use an acrylic, non-toxic paint that won’t harm nearby plants.

11. Install Glass Blocks for Privacy

Want a unique twist? Sporadically placed glass blocks provide privacy and visual interest while letting light through. Pairing wood and glass creates a stunning modern contrast.

12. Mix Function with Fun

Add pillows, fairy lights, or outdoor curtains to complete your pergola personalization. These finishing touches offer comfort, style, and charm for entertaining or unwinding outdoors.


At Outdoor Living Today, we offer premium cedar pergola kits that are easy to assemble and ready to personalize. Whether you’re looking for shade, structure, or a statement piece, our customizable backyard structures are built to last.

Read More

How to Maintain Your Outdoor Pergola and Keep It Looking Beautiful Year-Round

1212 3

An outdoor pergola is a stylish open-air structure perfect for creating shade and adding ambiance to your backyard. Whether covered in climbing vines or paired with retractable canopies, pergolas made of wood, vinyl, plastic, or metal require regular care to maintain their appearance and structural integrity. Here’s a complete guide on how to properly maintain your pergola and ensure it lasts for many years.


1. Hose It Down Regularly

Regardless of your pergola’s material, the first step in maintenance is a thorough rinse. Use a high-pressure hose to remove surface dirt, pollen, or debris. Start at the top and work your way downward. Be sure to clear the area of furniture and décor to avoid damage during the process.

2. Clean with the Right Tools

Choose a bristle brush and a suitable cleaner for your pergola’s material:

  • Wood: Use a wood-safe cleaner and remove any peeling paint or splinters.

  • Metal: Scrub away any rust buildup using a wire or bristle brush.

  • Vinyl: Follow manufacturer guidelines—usually, mild detergent works well. Use a toothbrush to reach tight corners or areas around hardware.

3. Remove Mildew and Rust Stains

Combat mildew with a mix of one cup of oxygen bleach and one gallon of water. Apply this solution after the initial rinse and let it sit until the mildew stains begin to fade. Rinse again thoroughly with soap and water.

If you notice black or brown rust stains from fasteners, consider replacing corroded hardware with stainless steel or aluminum options.

4. Rinse Thoroughly

After applying cleaning solutions, rinse again using a hose to remove all residue. Check for spots that may need a second round of cleaning and repeat as necessary.

5. Touch-Up and Repair Damage

1212a 1

Use a touch-up or repair kit to fix cuts, dings, or gouges. Wood or metal putty can patch small damage, and many vinyl pergolas include specialized kits for surface restoration. Sand down any rough spots before refinishing.

6. Seal and Stain for Longevity

If you have a cedar pergola, you’ll notice it gradually turns from a rich reddish tone to a silvery gray. To preserve its original hue:

  • Clean thoroughly

  • Apply a translucent oil-based wood stain for cedar

  • Let it dry and then seal Reapply stain and sealant every other year to maintain appearance and protection.

7. Address Fasteners and Loose Hardware

Inspect all fasteners and replace any that show corrosion. Use rust-resistant stainless steel or aluminum. Tighten loose bolts and screws to keep the structure secure.

8. Paint for Added Protection

1216 5
1216 5

In hot, dry climates, UV rays can cause wood pergolas to crack and fade. Apply a durable, heat-resistant exterior paint for long-term protection and aesthetic appeal.

9. Trim Vines and Greenery

While creeping vines add beauty and shade, overgrowth can increase the pergola’s weight load. Trim vines a few times a year to reduce stress on the frame. They’ll grow back quickly and stay healthy with regular care.


Conclusion With proper maintenance, your outdoor pergola can remain an attractive and functional centerpiece in your backyard for years. Regular cleaning, careful inspection, and minor seasonal upkeep can prevent costly repairs and preserve the pergola’s beauty and strength.

Read More

The History and Modern Use of Western Red Cedar Wood

Western Red Cedar Pergola Canopy Outdoor Living Today

Western Red Cedar has long been a symbol of strength, sustainability, and natural beauty. With a legacy stretching back thousands of years and a growing reputation in modern landscaping, this remarkable wood species continues to shape outdoor living spaces across North America.

From ancient Indigenous tools to premium DIY garden structures, here’s everything you should know about Western Red Cedar wood — including why it remains one of the most trusted and eco-friendly building materials today.


🌲 A Brief History of Western Red Cedar

Known scientifically as Thuja plicata, Western Red Cedar is a large evergreen native to the Pacific Northwest of North America. Despite not being a “true cedar,” this tree holds deep cultural and practical significance — especially for the Indigenous peoples of British Columbia, Alaska, Washington, and Oregon.

Indigenous Use & Cultural Importance

Native communities have relied on Western Red Cedar for over 8,000 years, using virtually every part of the tree:

  • Bark: woven into mats, baskets, rain hats, and ropes

  • Wood: carved into dugout canoes, bentwood boxes, planks, and homes

  • Branches: shaped into bows, fishing lines, and cords

Some coastal Indigenous groups even refer to themselves as “People of the Red Cedar,” with oral legends describing the tree as a divine gift from the Great Spirit to provide shelter, tools, clothing, and protection.


🌿 Natural Characteristics

OLT western red cedar forest wide angle shot ebb705b7 7bc5 4e05 971f 7391e37b1c51

Western Red Cedar is instantly recognizable for its:

  • Soft red-brown coloring

  • Scale-like leaves in opposing rows

  • Drooping lower branches and towering, conical form (up to 60 meters tall!)

  • Aromatic scent (from natural tannins)

It thrives in cool, wet climates and can live for over 1,000 years. Today, most natural growth occurs along the wet coastal belt of the Pacific Northwest.


🧰 Why Western Red Cedar Is Ideal for Outdoor Projects

Western Red Cedar’s durability, light weight, and natural resistance to decay make it one of the most trusted woods for outdoor construction.

🪵 Key Benefits:

  • Naturally Rot-Resistant: The wood contains natural oils and tannins that repel moisture and decay.

  • Bug-Repelling Properties: Its strong aroma helps deter termites and other pests.

  • Weather Friendly: Unfinished cedar weathers to a silvery-gray but also holds paint or stain well.

  • Thermal Insulation: Cedar keeps spaces cool in summer and warm in winter, making it ideal for greenhouses or sheds.

  • Workability: It’s light, easy to cut, and simple to fasten — making it a favorite for DIYers.


🛠 Modern-Day Uses

Today, Western Red Cedar is one of the most sought-after materials for:

It’s available in clear and knotty grades, and comes in everything from rough timbers to 1×4 fence boards, making it suitable for virtually any backyard build.


🛒 Where to Buy Western Red Cedar

Western Red Cedar is widely available through:

  • Local lumber dealers

  • Specialty manufacturers that sell pre-cut DIY kits like Outdoor Living Today

  • Online retailers focused on sustainable cedar structures

Looking for something ready to assemble? Browse our curated collection of Western Red Cedar kits — sustainably sourced, pre-drilled, and easy to build.

For more technical specs, finishes, and sourcing details, visit the Western Red Cedar Lumber Association (WRCLA), the industry’s leading authority on cedar wood products.


Final Thoughts

Western Red Cedar’s long history, natural durability, and ecological sourcing make it one of the best materials for anyone looking to build outdoor structures that last. Whether you’re a seasoned carpenter or weekend DIYer, cedar delivers on beauty, strength, and sustainability — with a legacy to match.

Read More