No products in the cart.
September 6, 2016
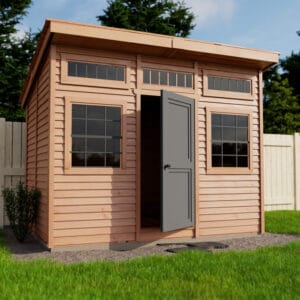
 An overcrowded garage can make it difficult to park the cars your family owns. Moreover, it becomes difficult to locate tools, gardening equipment, and other items all stored together in the garage. Instead, you can build a storage shed that will contain the space to neatly organize gardening equipment and yard tools which will also increase the value of the property.
Constructing the Frame of your Outdoor Storage Shed
The first step to building a garden shed is to construct the frame. For this begin by clearing and leveling the ground where the shed is going to be placed. Now place cinder blocks at the four corners, four feet from each other.Next cut 4×4 pressure treated posts to the desired lengths making sure to cut the ends at a 45° angle. Place the posts over the cinder blocks and ensure that they are level using a 4-foot level or any size of level for that matter.Construct the Deck of Your DIY Storage Shed
Once the frame is in place you need to construct the deck of your DIY storage shed. This comprises pressure treated 2×6 pieces that are set vertically on the frame. They should be attached to the frame using a framing nailer. Begin by installing the two nine foot side pieces.Now, place the two four foot side pieces next to each other and mark of the joist locations at 16’ intervals. Now you can secure the end pieces.The next step is to cut the 2’ (’) into 6’ joists to the right lengths and nailing them to the frame. After the joists are secured, lay the 5/4’ decking on top and secure the decking to the joists using a screw gun.The first decking edge should overhang the deck frame by half an inch.
Building the Walls of Your Storage Shed
To build the walls of your storage shed, lay the wall pieces – the top plate, bottom plate, and studs and use a nail gun to secure the pieces together. Use this method to construct all the wall panels. Build two narrower wall panels for the wall which will have the door.Nailing the Walls of your Outdoor Storage Shed
Now nail each wall panel to the decking as well as to the adjacent wall panel. To ensure that the walls form a square, you need to use a framing square. On the side of the shed that will have the door, build two narrower wall panels and strengthen them using 2x4s.Strengthening the Framing
Once you have installed all the walls, you need to strengthen the framings. For this nail 2x4s across the walls at the top such that they will form a double top plate.Exterior Siding for Your DIY Storage Shed
Once the wall frames are strengthened, you are ready to hand the exterior siding. Just hang the 4ˈx8ˈ OSB sheets on the outside of the storage shed to form the siding.How to Build a Shed Roof
The next step is to add the roof to the shed. Cut 2×6 boards for the roof rafters and fix them to the headers. The roof rafters are attached using OSB cleats.Now add 1×6 strips on top of the rafters so that the rafters will be tied together and provide support to the corrugated roof. The roofing sheets should be nailed to the rafters using self sealing nails and washers that have been designed for this use.Adding Shed Windows
Now that the roof has been fixed, you can cut the walls to locate the shed windows and recessed storage boxes. When cutting the walls you need to make sure that the studs are not damaged.Now you can fix the doors for the windows and the main entrance as well as the storage cubbies you have cut out. You can also add a potting bench to your storage shed to make gardening easier.The doors should be made from 3.4’ plywood, while the doors for the storage cubbies can be made from 1.2’ plywood. Depending on your interest you can paint the interior of the shed in contrasting colors to mark the storage cubbies.Vinyl Siding for Your Storage Shed
 You are now ready to add vinyl siding to the exterior of the shed. Begin applying the siding from the edges with the decorative trim and work your way to the center.
Adding Ramp to the Outdoor Shed
The final touch for the garden shed can be ramp at the front entrance. This will enable you to easily move mowers and wheelbarrows into the shed.DIY Storage Shed
A DIY storage shed is a fairly simple project that can help move a lot of essential yard tools and gardening equipment away from or outside of the garage.Apart from freeing up garage space, this shed will help you to properly organize and store all gardening supplies and tools in a single place that is easy to access from the garden.With a cutting saw, nailing gun, and the right types of wood, a diy storage shed should be easy to construct and you will have bragging rights over your neighbors for years.September 6, 2016
-
 On SaleSale!%Off12Save $1,0741074$12%1074$On SaleSale!%Off10Save $825825$10%825$On SaleSale!%Off6Save $400400$6%400$On SaleSale!%Off12Save $1,0741074$12%1074$
 -
 On SaleSale!%Off11Save $410410$11%410$On SaleSale!%Off10Save $350350$10%350$On SaleSale!%Off10Save $330330$10%330$On SaleSale!%Off6Save $200200$6%200$On SaleSale!%Off7Save $240240$7%240$On SaleSale!%Off7Save $220220$7%220$On SaleSale!%Off11Save $410410$11%410$
 -
 On SaleSale!%Off26Save $1,8301830$26%1830$On SaleSale!%Off26Save $1,8301830$26%1830$
 -
 On SaleSale!%Off17Save $205205$17%205$On SaleSale!%Off17Save $205205$17%205$
 -
 On SaleSale!%Off25Save $756756$25%756$On SaleSale!%Off25Save $763763$25%763$On SaleSale!%Off25Save $681681$25%681$On SaleSale!%Off25Save $521521$25%521$On SaleSale!%Off25Save $763763$25%763$
 -
 On SaleSale!%Off19Save $1,8201820$19%1820$On SaleSale!%Off19Save $1,8201820$19%1820$

